Recent woodworking projects
I’ve recently (as in “over the last year-ish”) finished several projects I’m somewhat satisfied with. I’m slowly turning an ash tree that used to stand in my family’s yard (and contained my childhood treehouse) into furniture for my own apartment & some for family as well.
Living room set
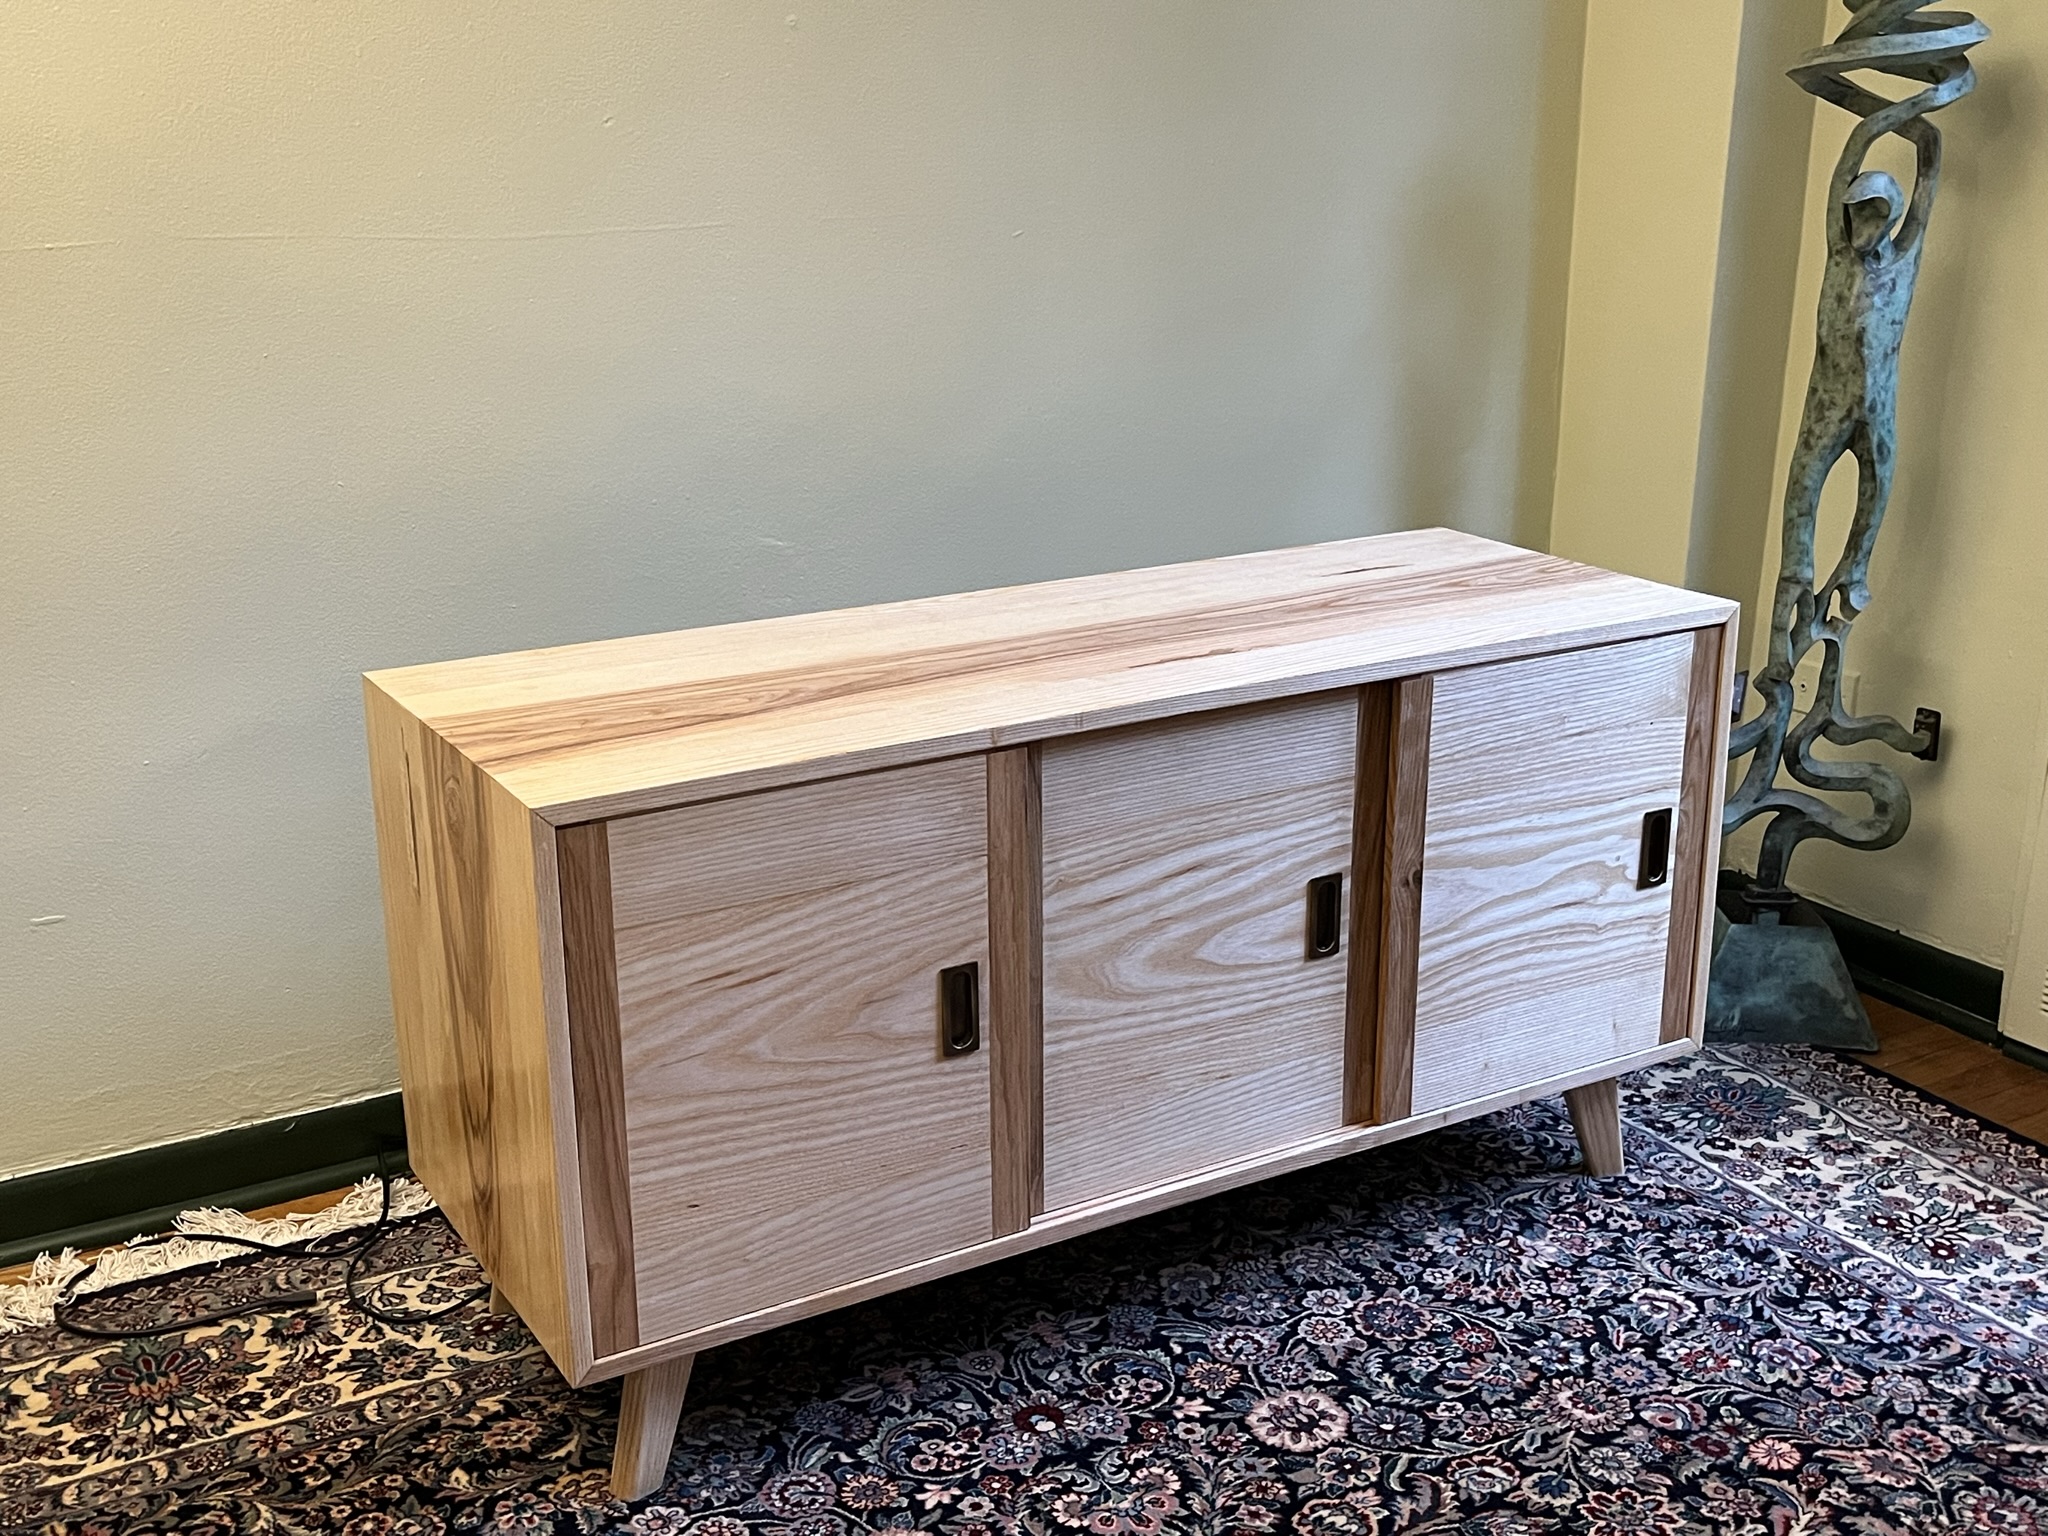
For my own apartment, I built a media console last year. I am both a nerd with a lot of digital devices and also somebody who hates the messiness of cords running everywhere, so my main goal here was something that would fit the various devices that connect to my TV, as well as utility devices like my router.
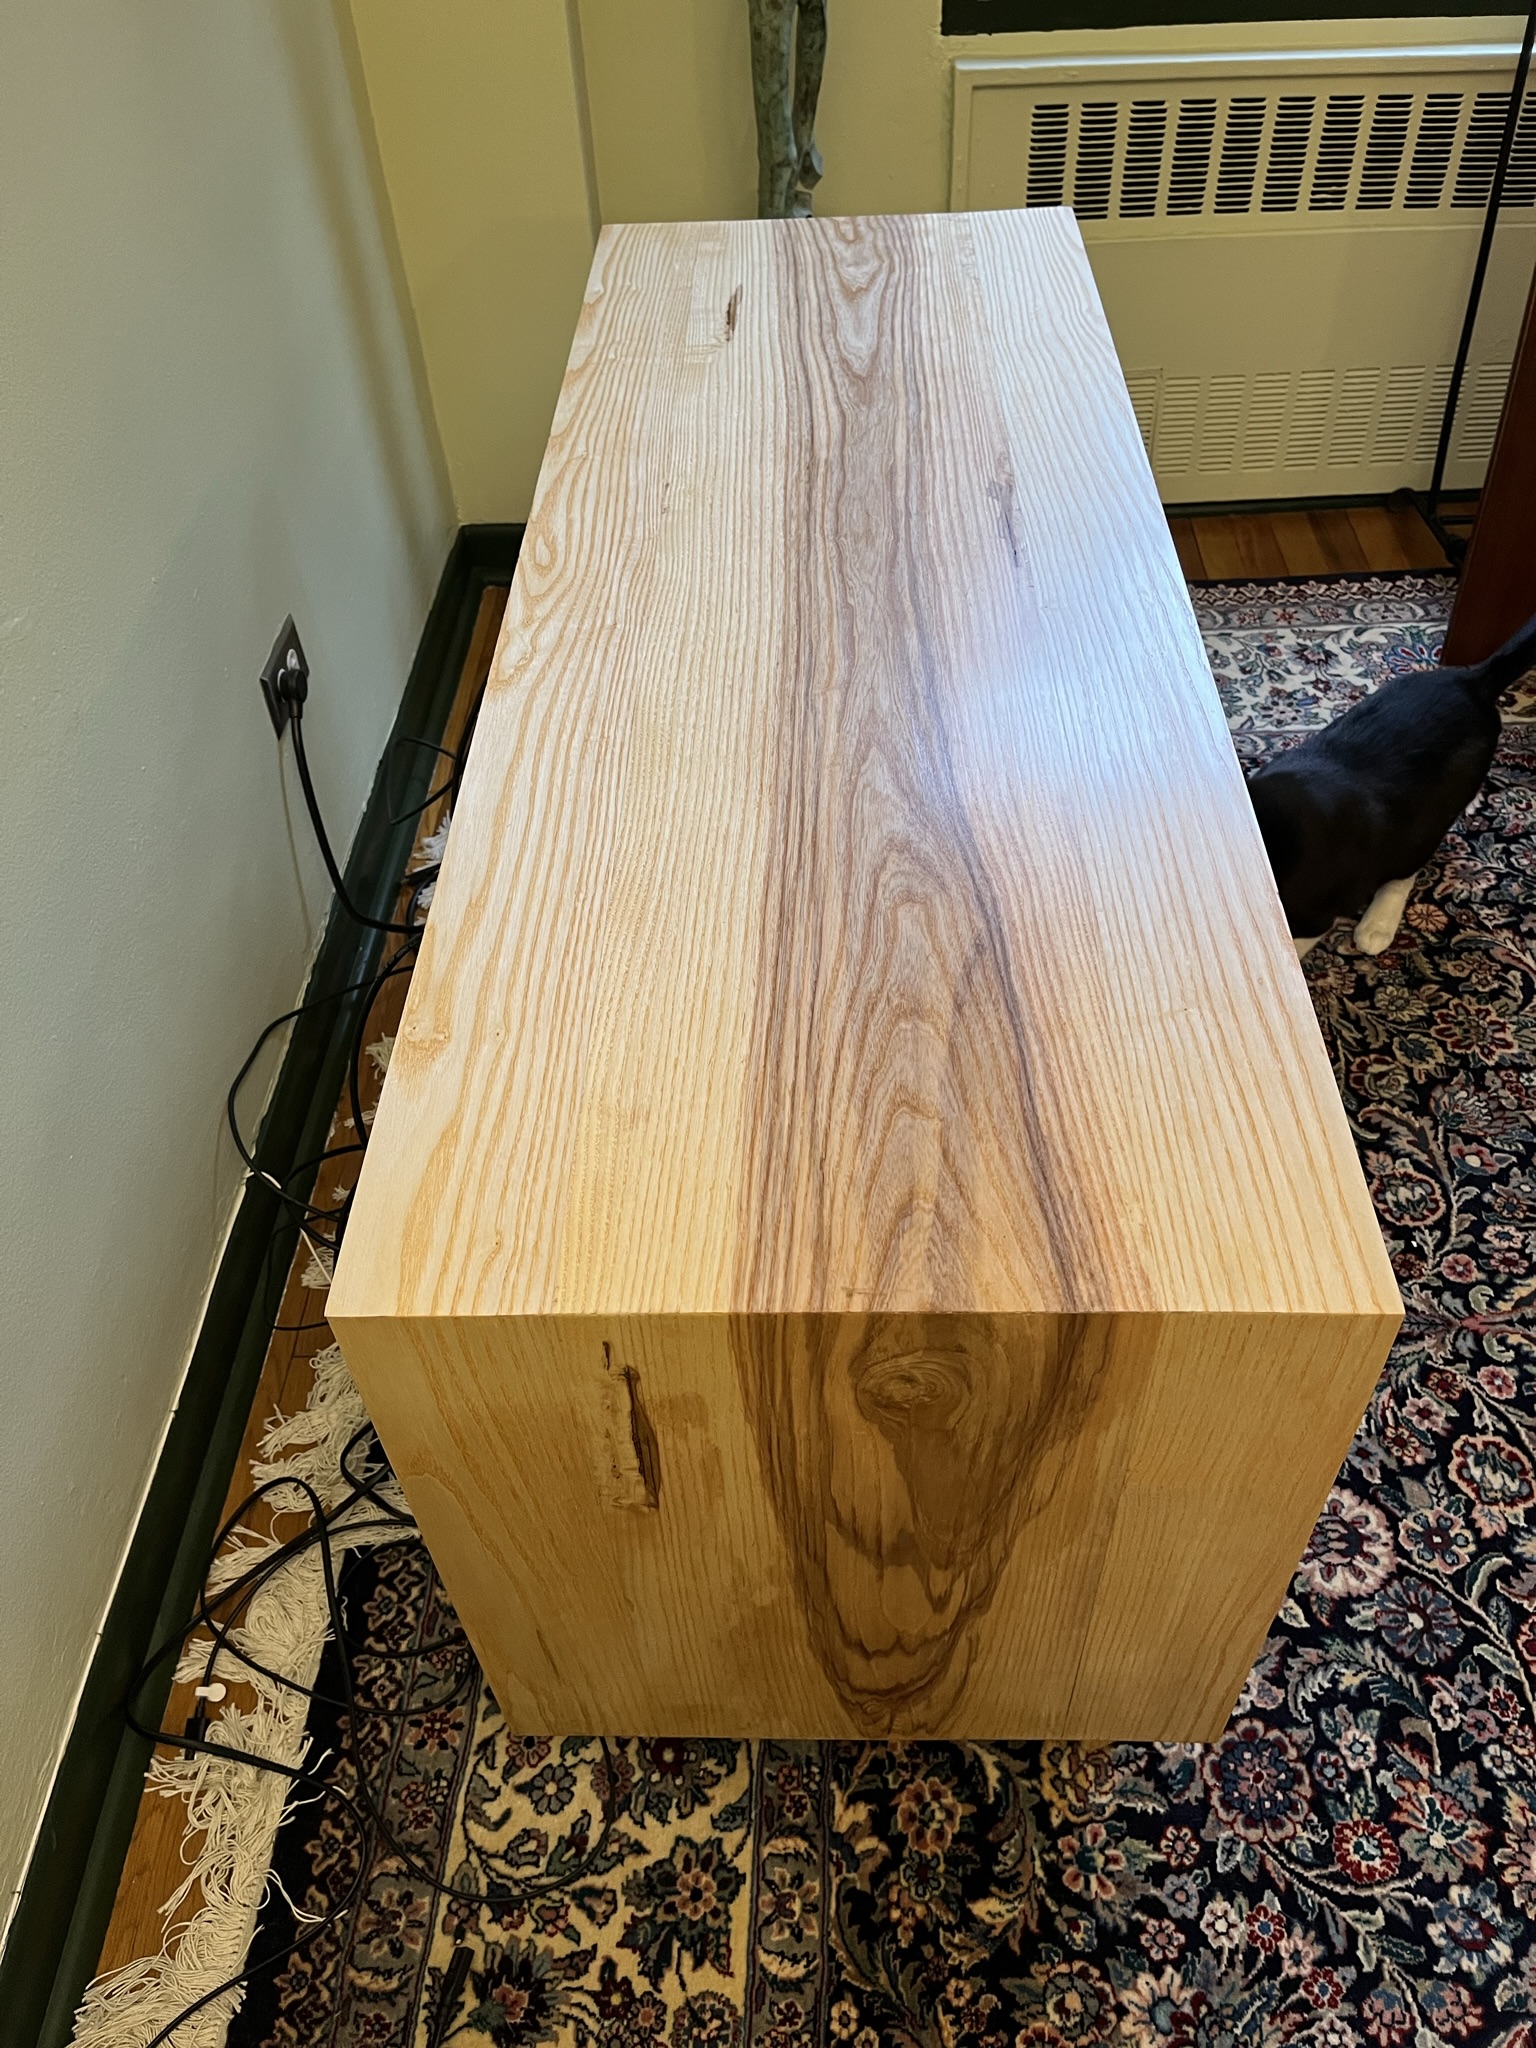
I tend to complicate each project I take on by adding one major new technique component I’m not familiar with. For this project, that was attempting to create the cabinet with waterfall grain, i.e. have continuous wood grain wrapping all the way around the body of the console from one piece of wood. This stemmed mostly just from noticing I had some very large pieces in my lumber stack with interesting grain, and I wanted to make effective use of that. Effective waterfall grain can be challenging in any case, and I think I kind of started myself on hard mode by attempting it on a pretty large piece (the cabinet is 49” long, 19” high, and 18” deep, so at one point I was doing miter cuts on a ~90” long panel) and with hardwood (as opposed to veneer or manufactured plywood).
It took a bunch of test cuts on scrap to get confident about the process, and even then actually getting the joints to look good took some finessing, but I think it’s a nice result. Of course, at the moment the waterfall grain I worked so hard on is mostly hidden under my TV, but eventually I’ll wall-mount that and be able to enjoy it more.

Like most projects, this was very much a learning experience. This large a cabinet body, and with waterfall grain to boot, forced me to get better at figuring out ways to get accurate cuts on very large & unwieldy pieces. Also like most projects, I made a bunch of mistakes and failed to fully consider a few things:
The doors look nice, but functionally haven’t worked out as well as I’d like. I made the mistake of cutting the sliding tracks for them in the cabinet body before I finished the doors themselves. That ended up being a mistake because the finger pulls I chose ended up being a bit thicker than I expected, so there’s virtually no clearance between the doors when sliding them. Which would be ok if they were structurally stable, but I’ve had some warping issues with panels I’ve made from this tree, and these doors being fairly thin they’ve predictably warped enough where they now don’t slide terribly well, and the middle one needs to be slid out of the way first or the right one hits the finger pull. I might try remaking these at some point as “DIY plywood” (basically building the doors out of 2 or 3 even thinner panel layers, but running opposing directions) to see if that’s more stable.
I also didn’t sufficiently consider that I intended to use this cabinet for storage of electronic devices that need active cooling, and actively cooled devices need ventilation. There are holes in the back for cable routing, and I intentionally made those a bit big for some air flow, so it’s fine for the low-powered stuff like the router & NAS. And it’s okay for consoles like the Switch & PS4 as long as the door is open. But my gaming PC (which already has some cooling challenges, being a high-powered machine built in a compact ITX case) definitely runs too hot inside the cabinet, and I’ve taken to just pulling it out and sitting it on the floor when I’m using it, which is a hassle and somewhat frustrates my whole goal of having this console as a way of hiding devices and keeping things tidy. If I get around to rebuilding the doors, I might also redesign them to allow some airflow from the front, and maybe also expand the cooling options from the back. I could even add a fan to the cabinet itself to increase airflow for the PC.
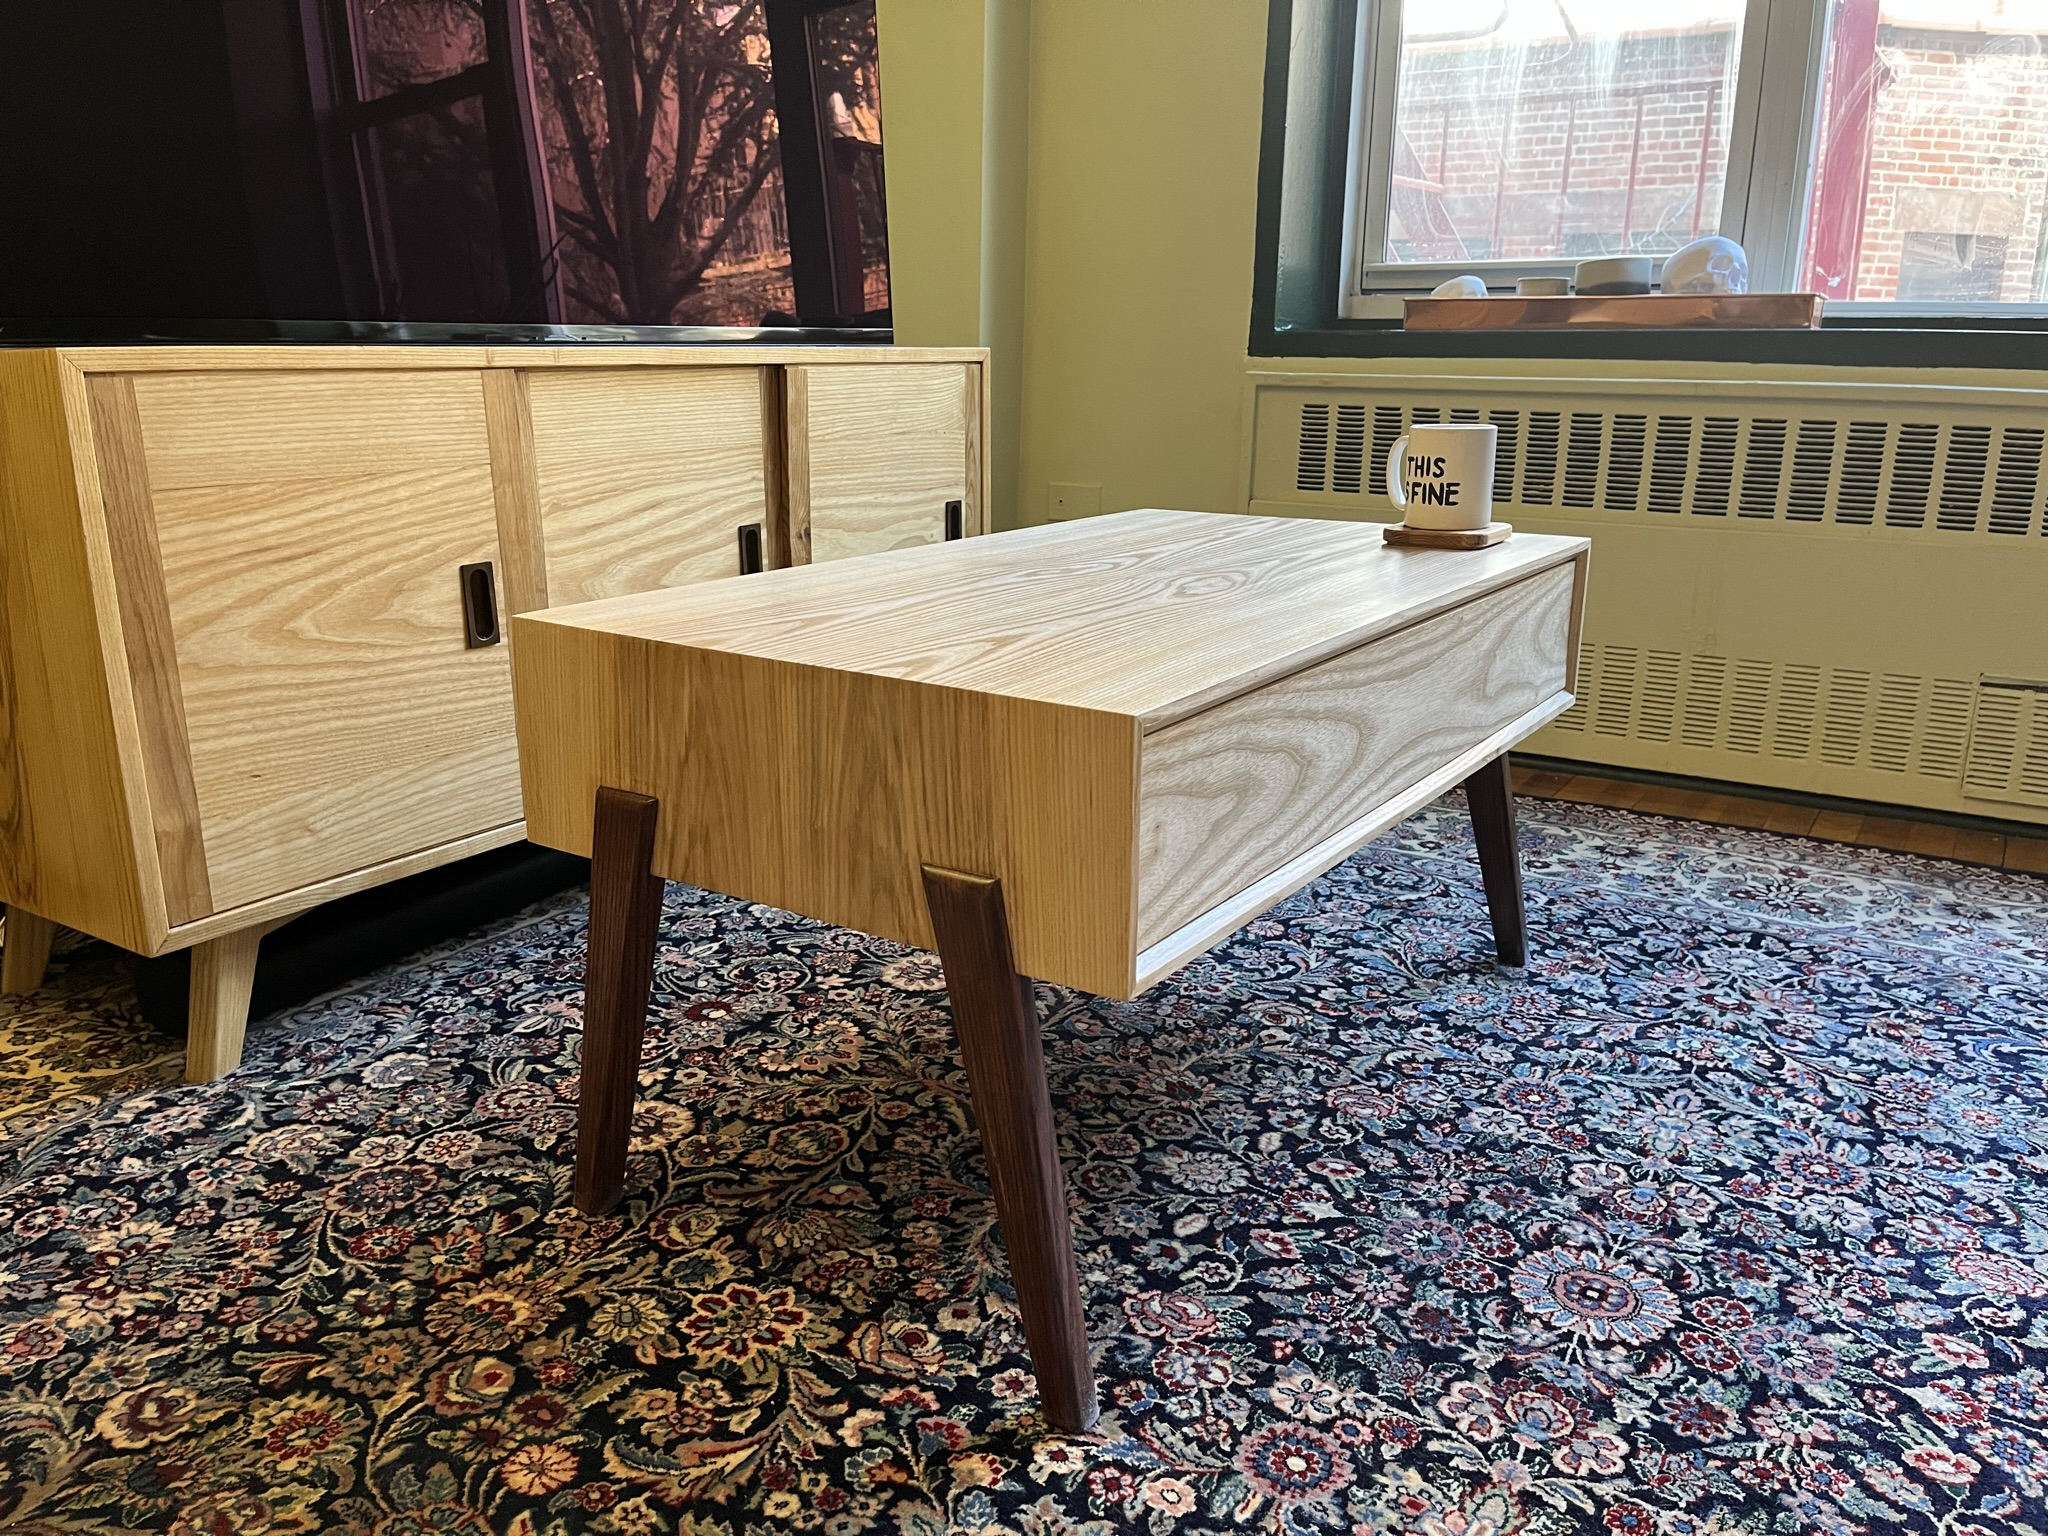
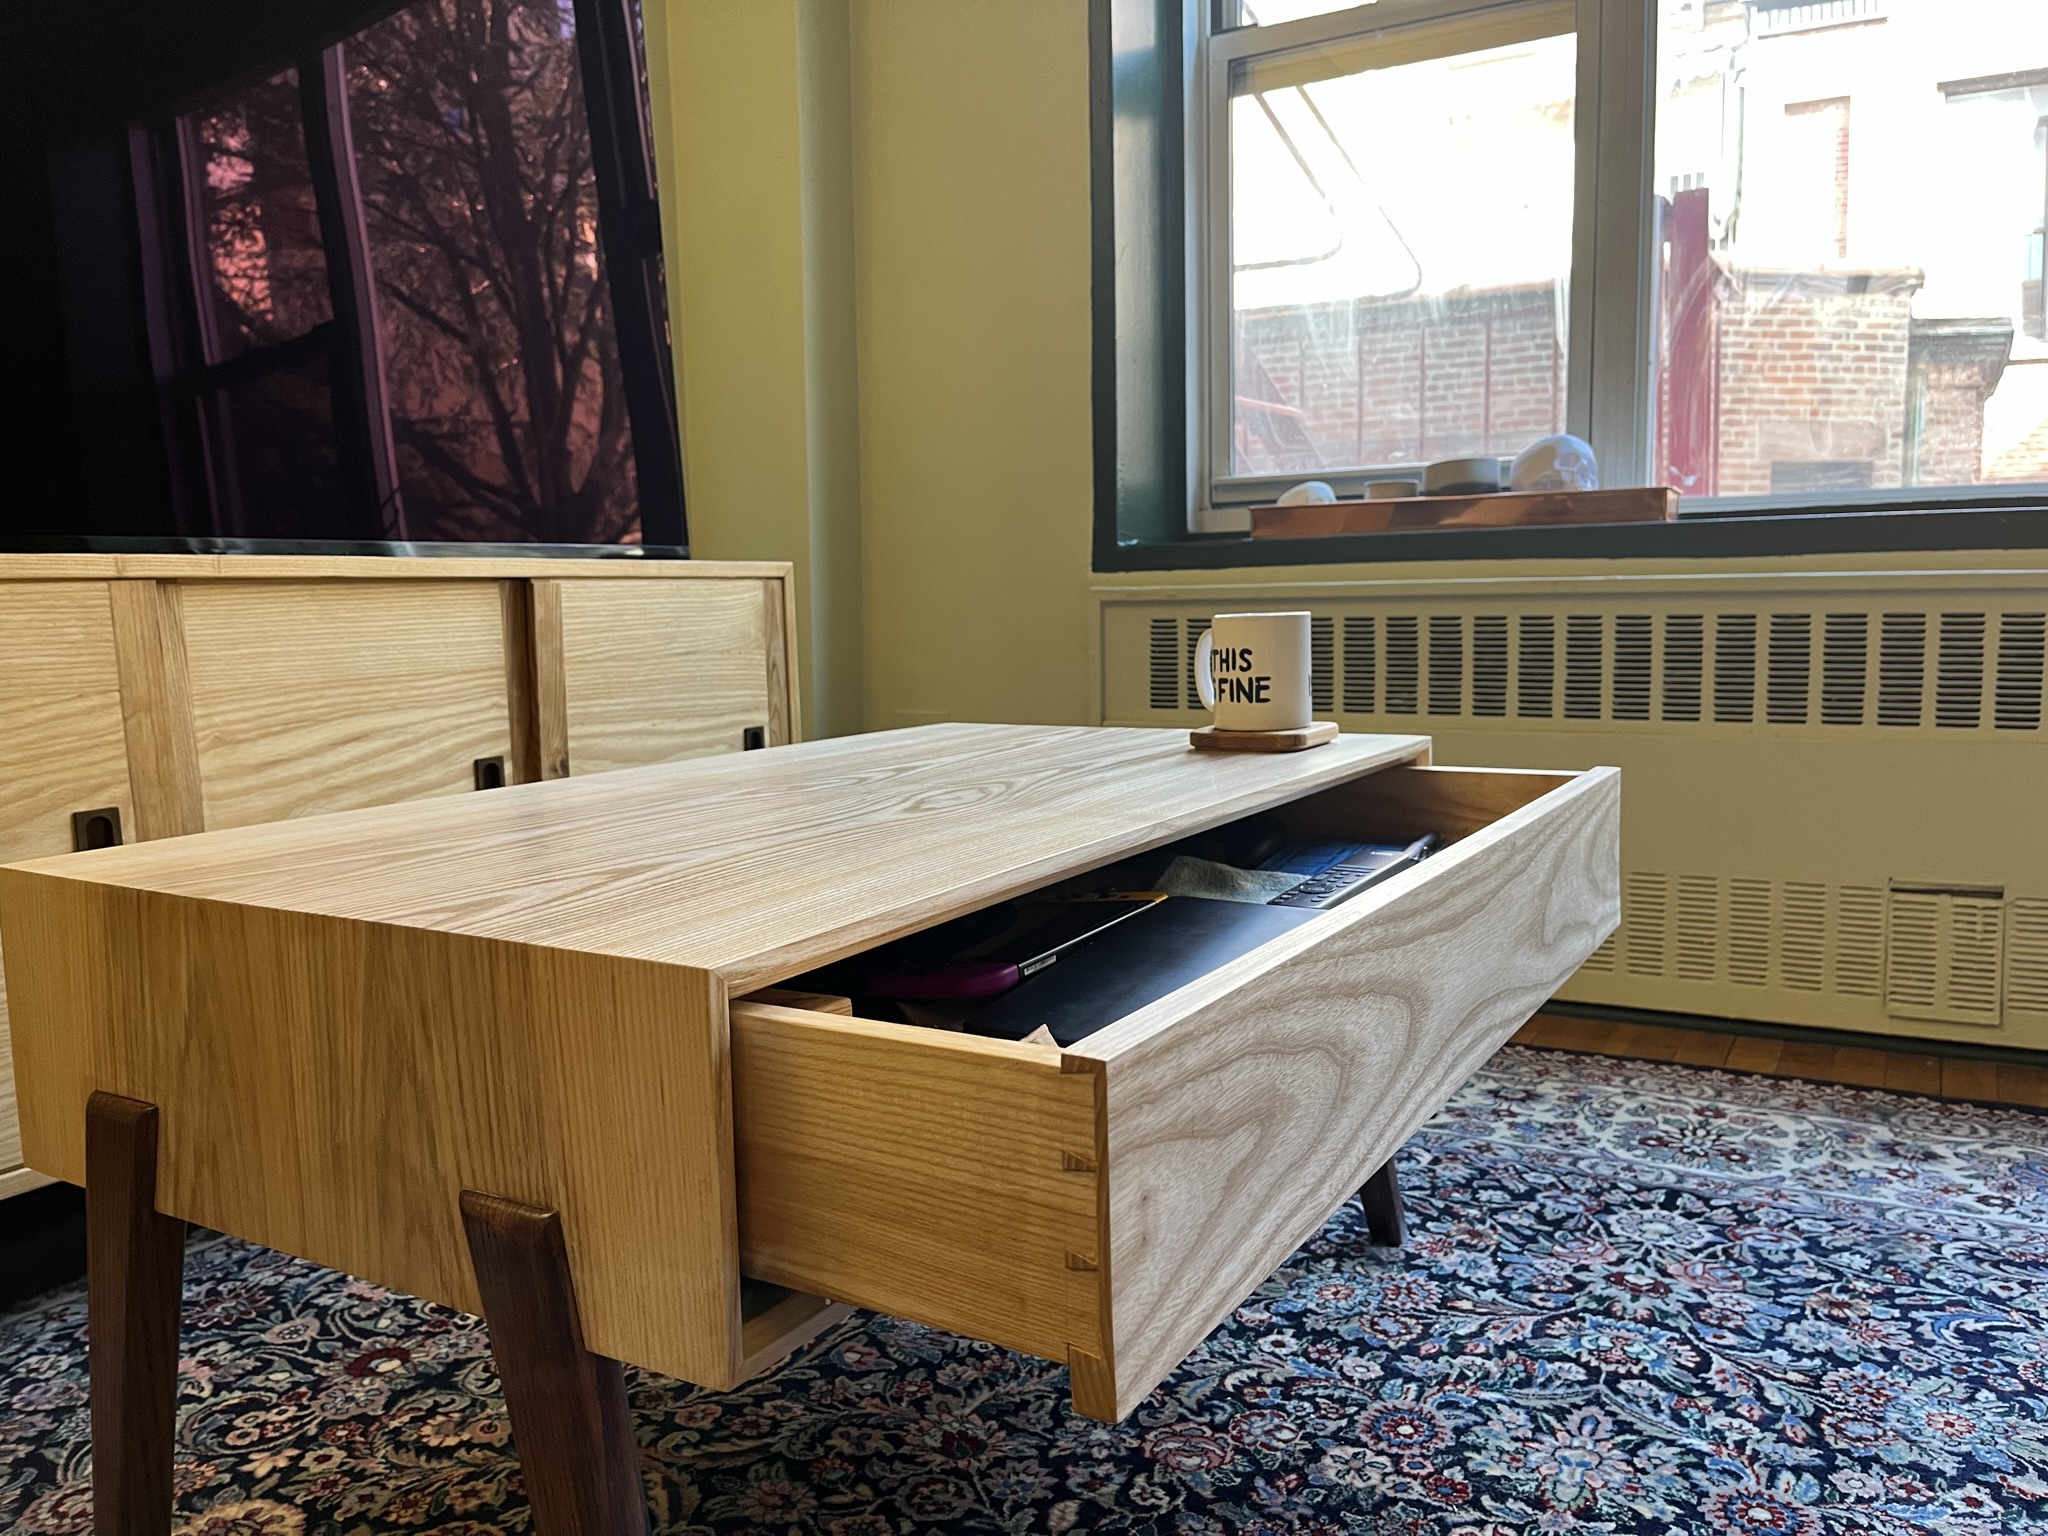
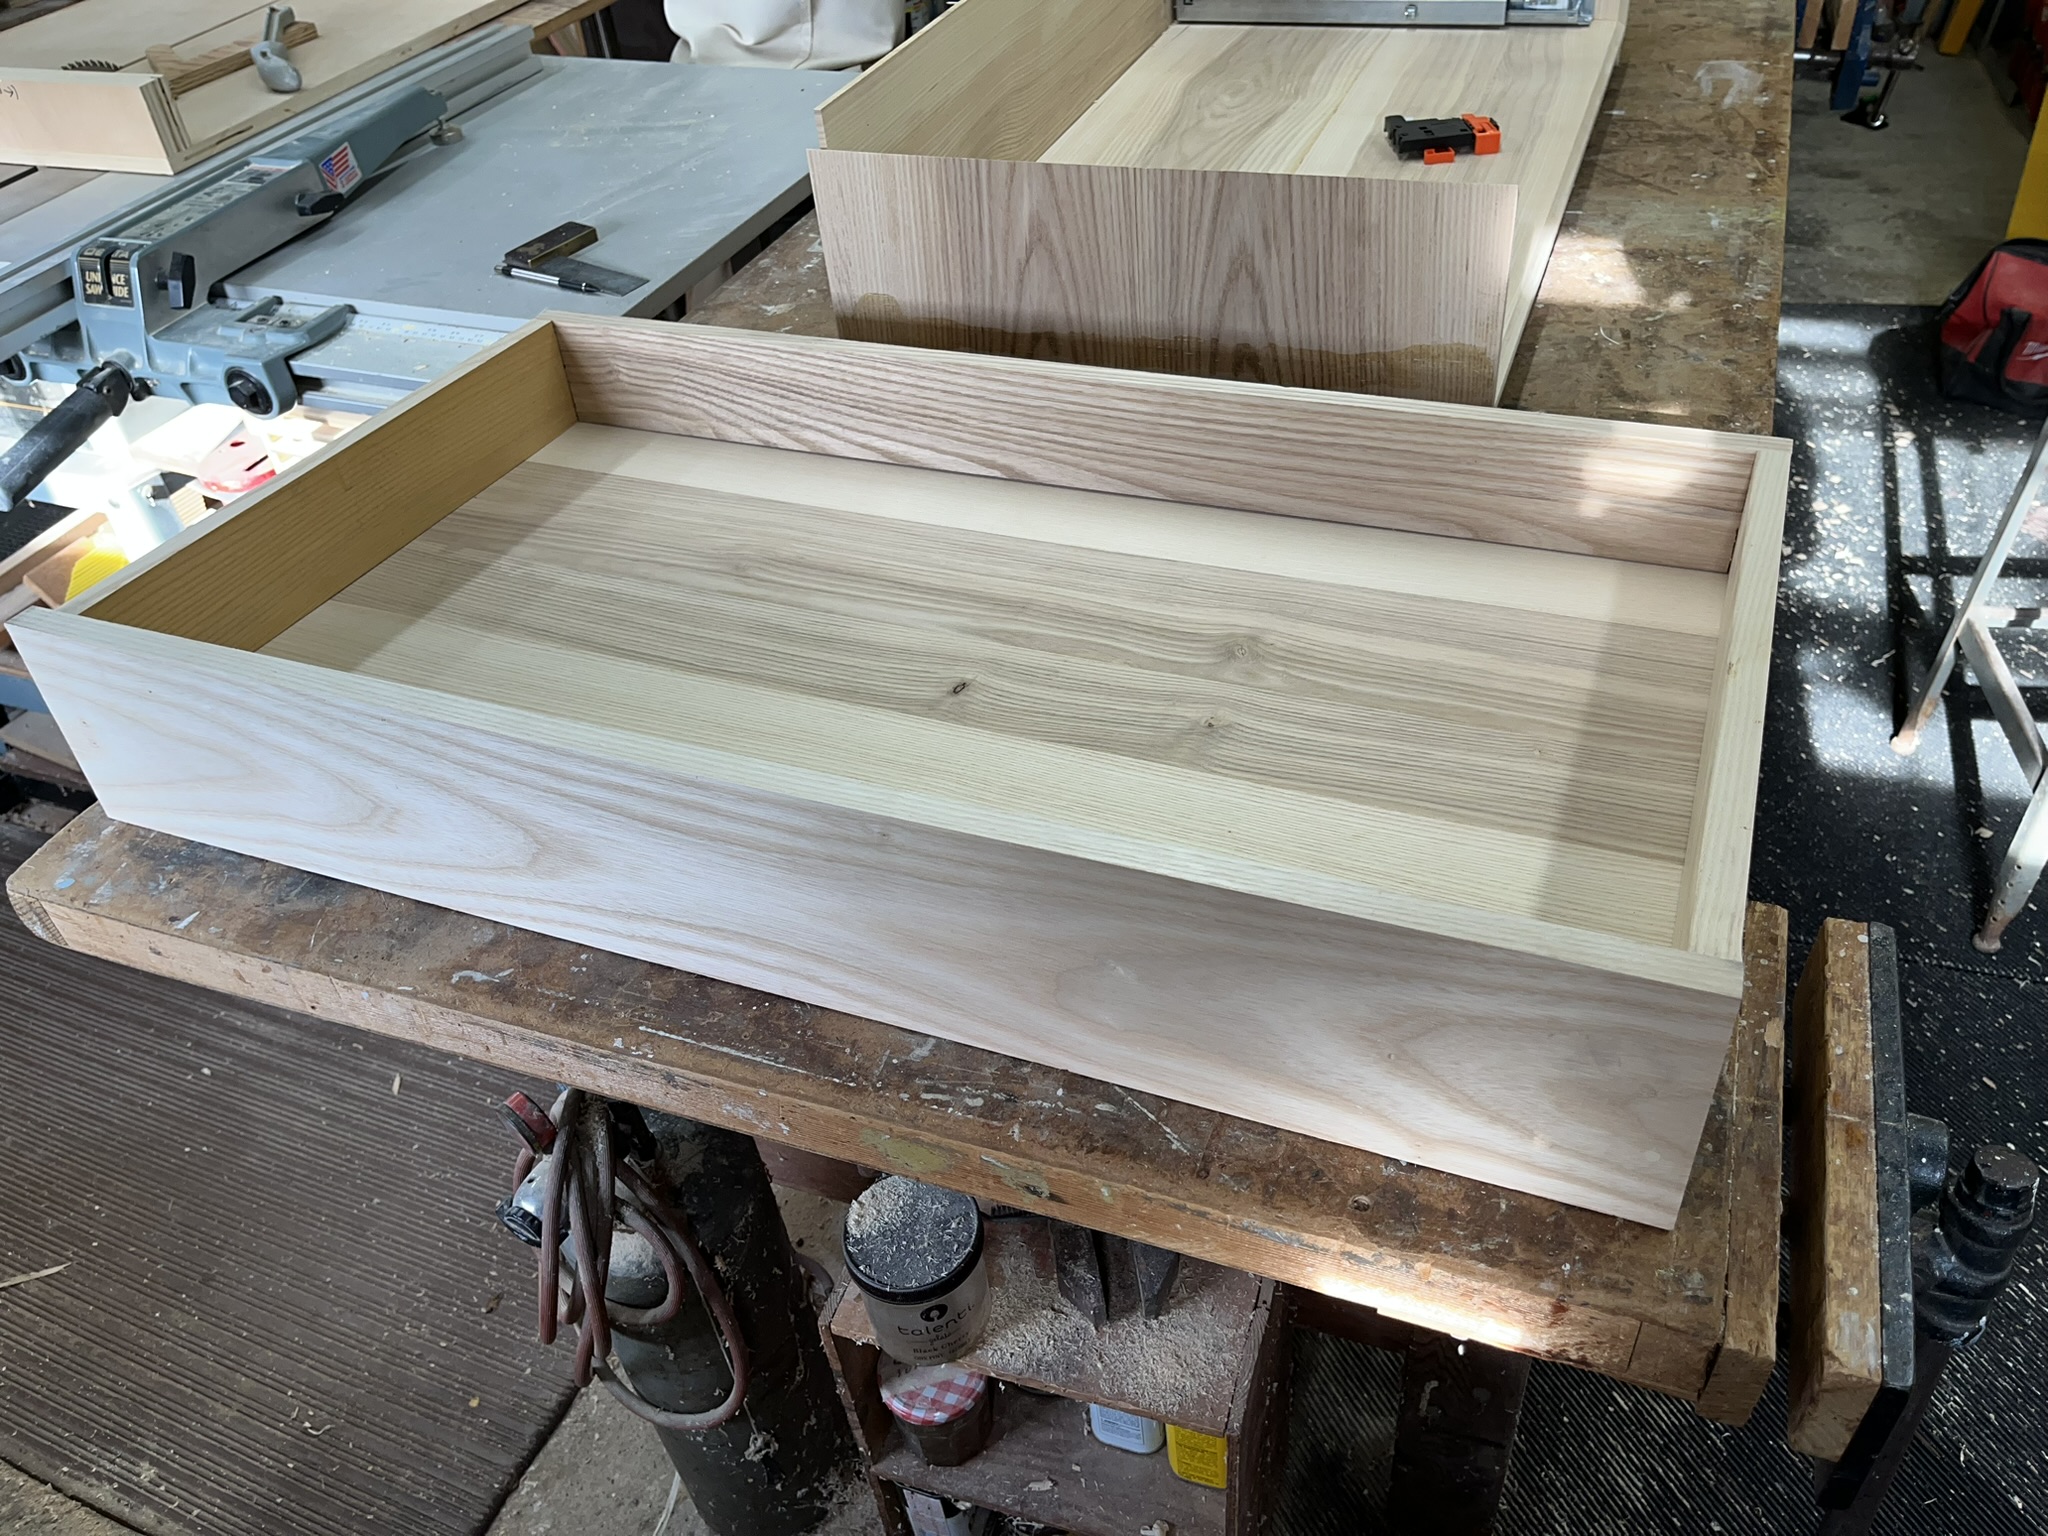
Next, I wanted a new coffee table. My old one was a hand-me-down that’s gone through several members of my family, and it was a fine coffee table but it was huge for a Brooklyn studio & filled the space between my couch & TV. I wanted something to match the mid-century vibes of the media console, and like the media console I wanted something with some storage to hide away detritus like coasters & the TV remote.
The technical challenge I set myself this time was some interesting leg joinery. I’m not even sure exactly what to call this joint, but I think it creates a nice, delicate appearance while also being plenty strong enough. I also repeated the waterfall grain here, in keeping with making a matching set with the media console.
I’ve mostly been bad at documenting the build process of my projects, but I’m trying to get better at it:
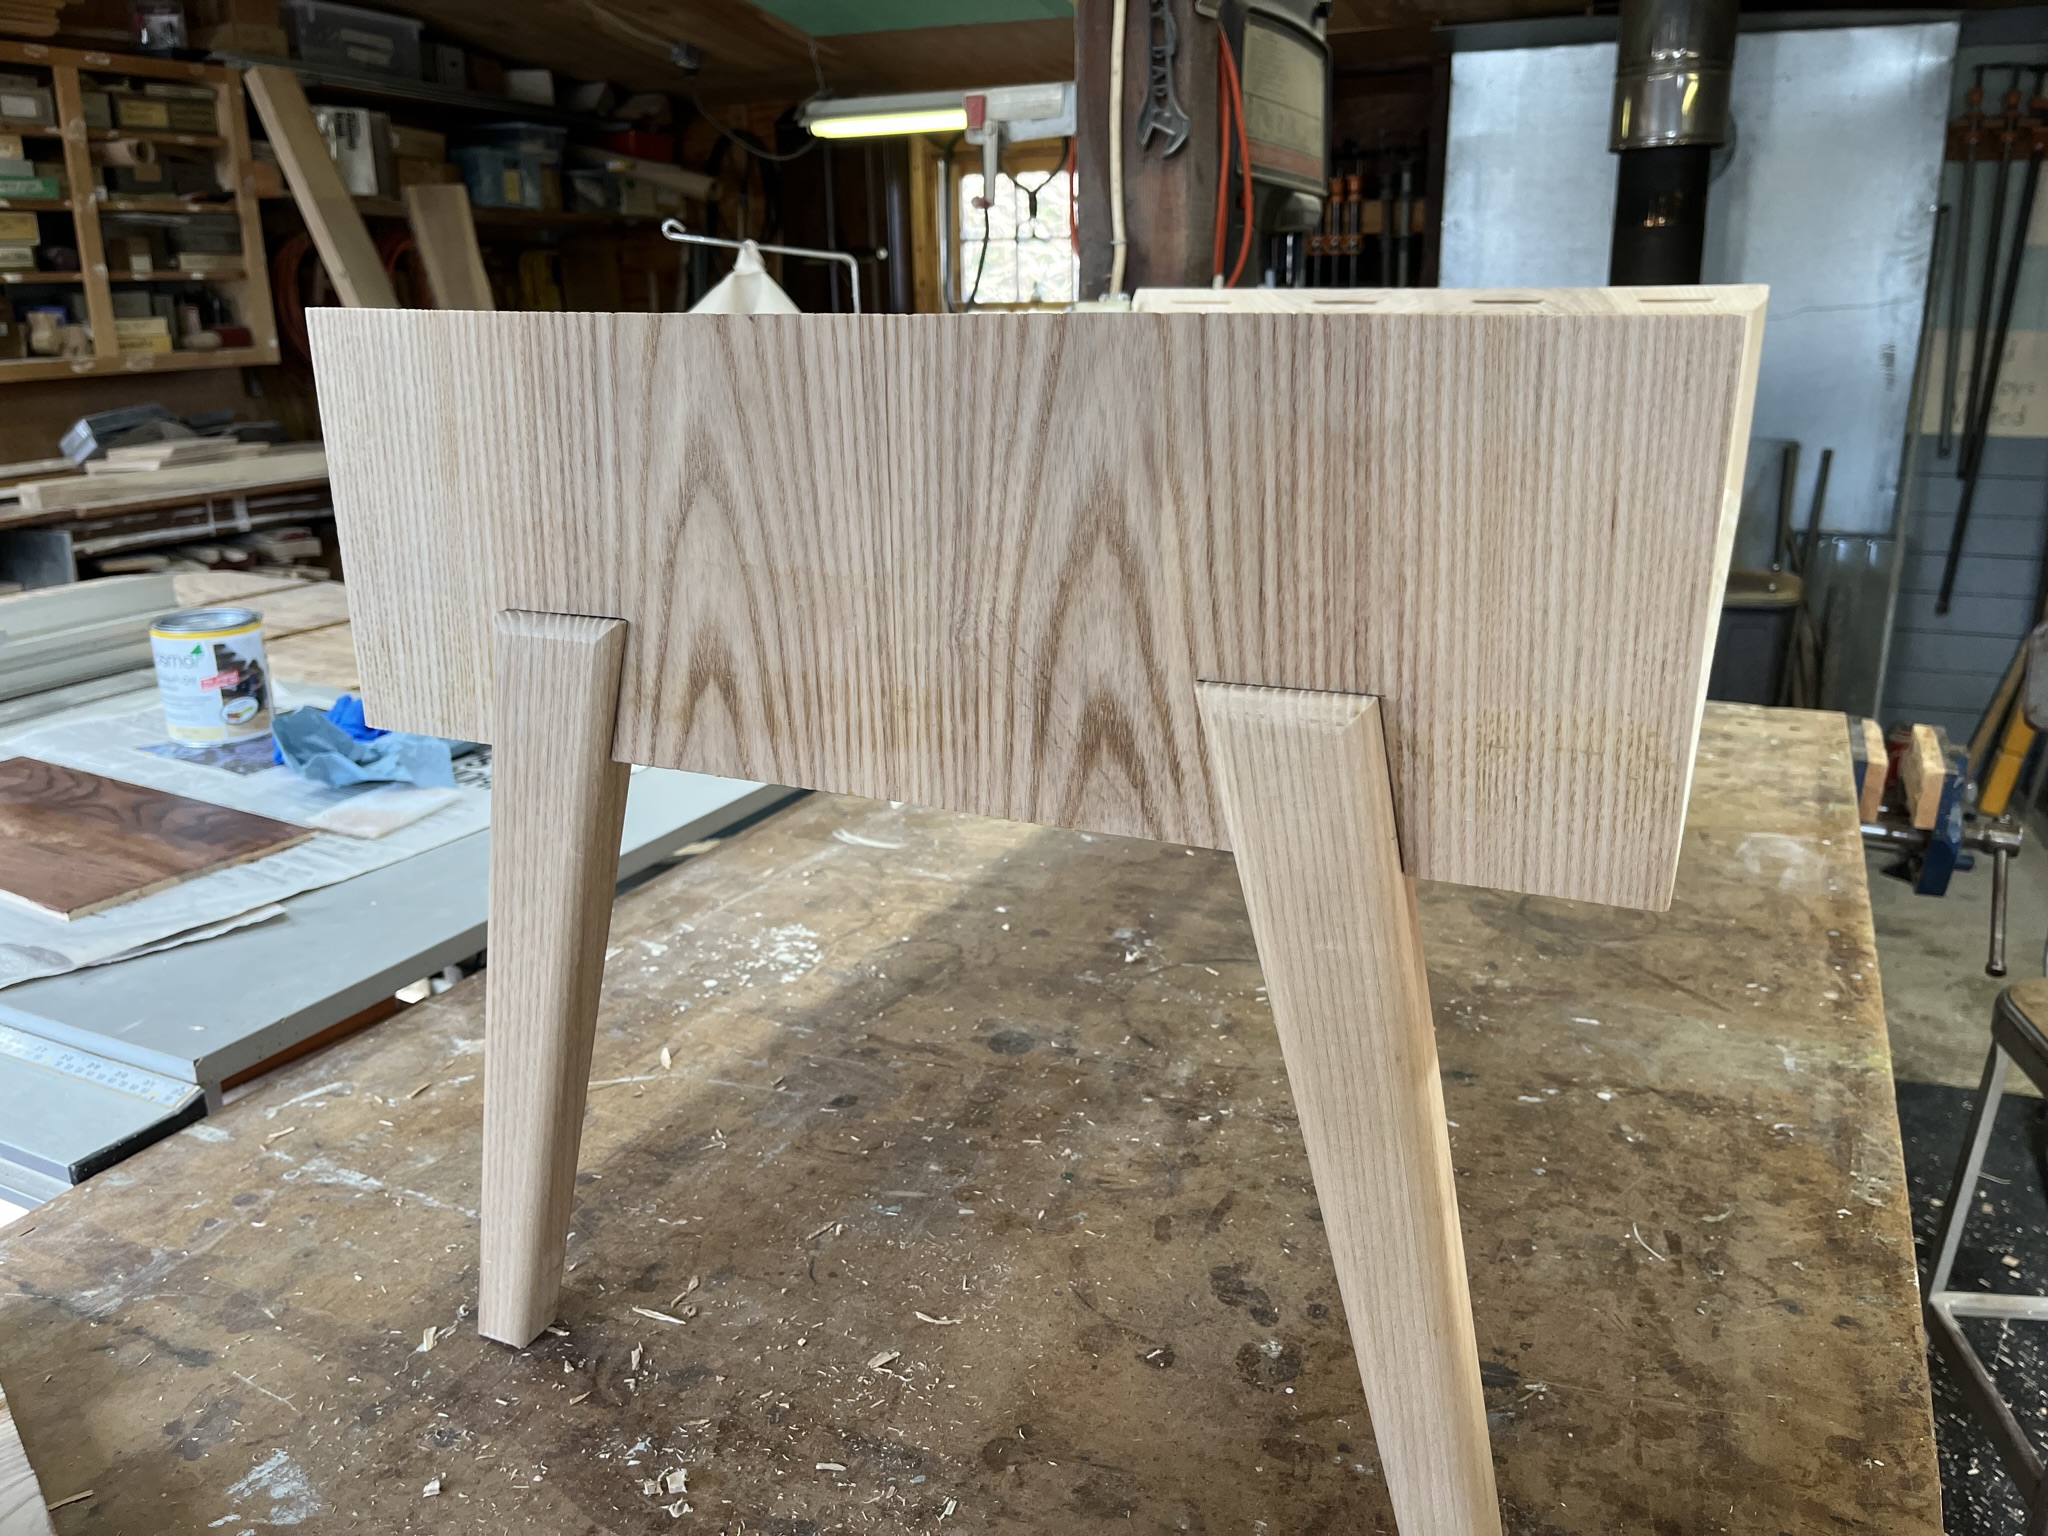
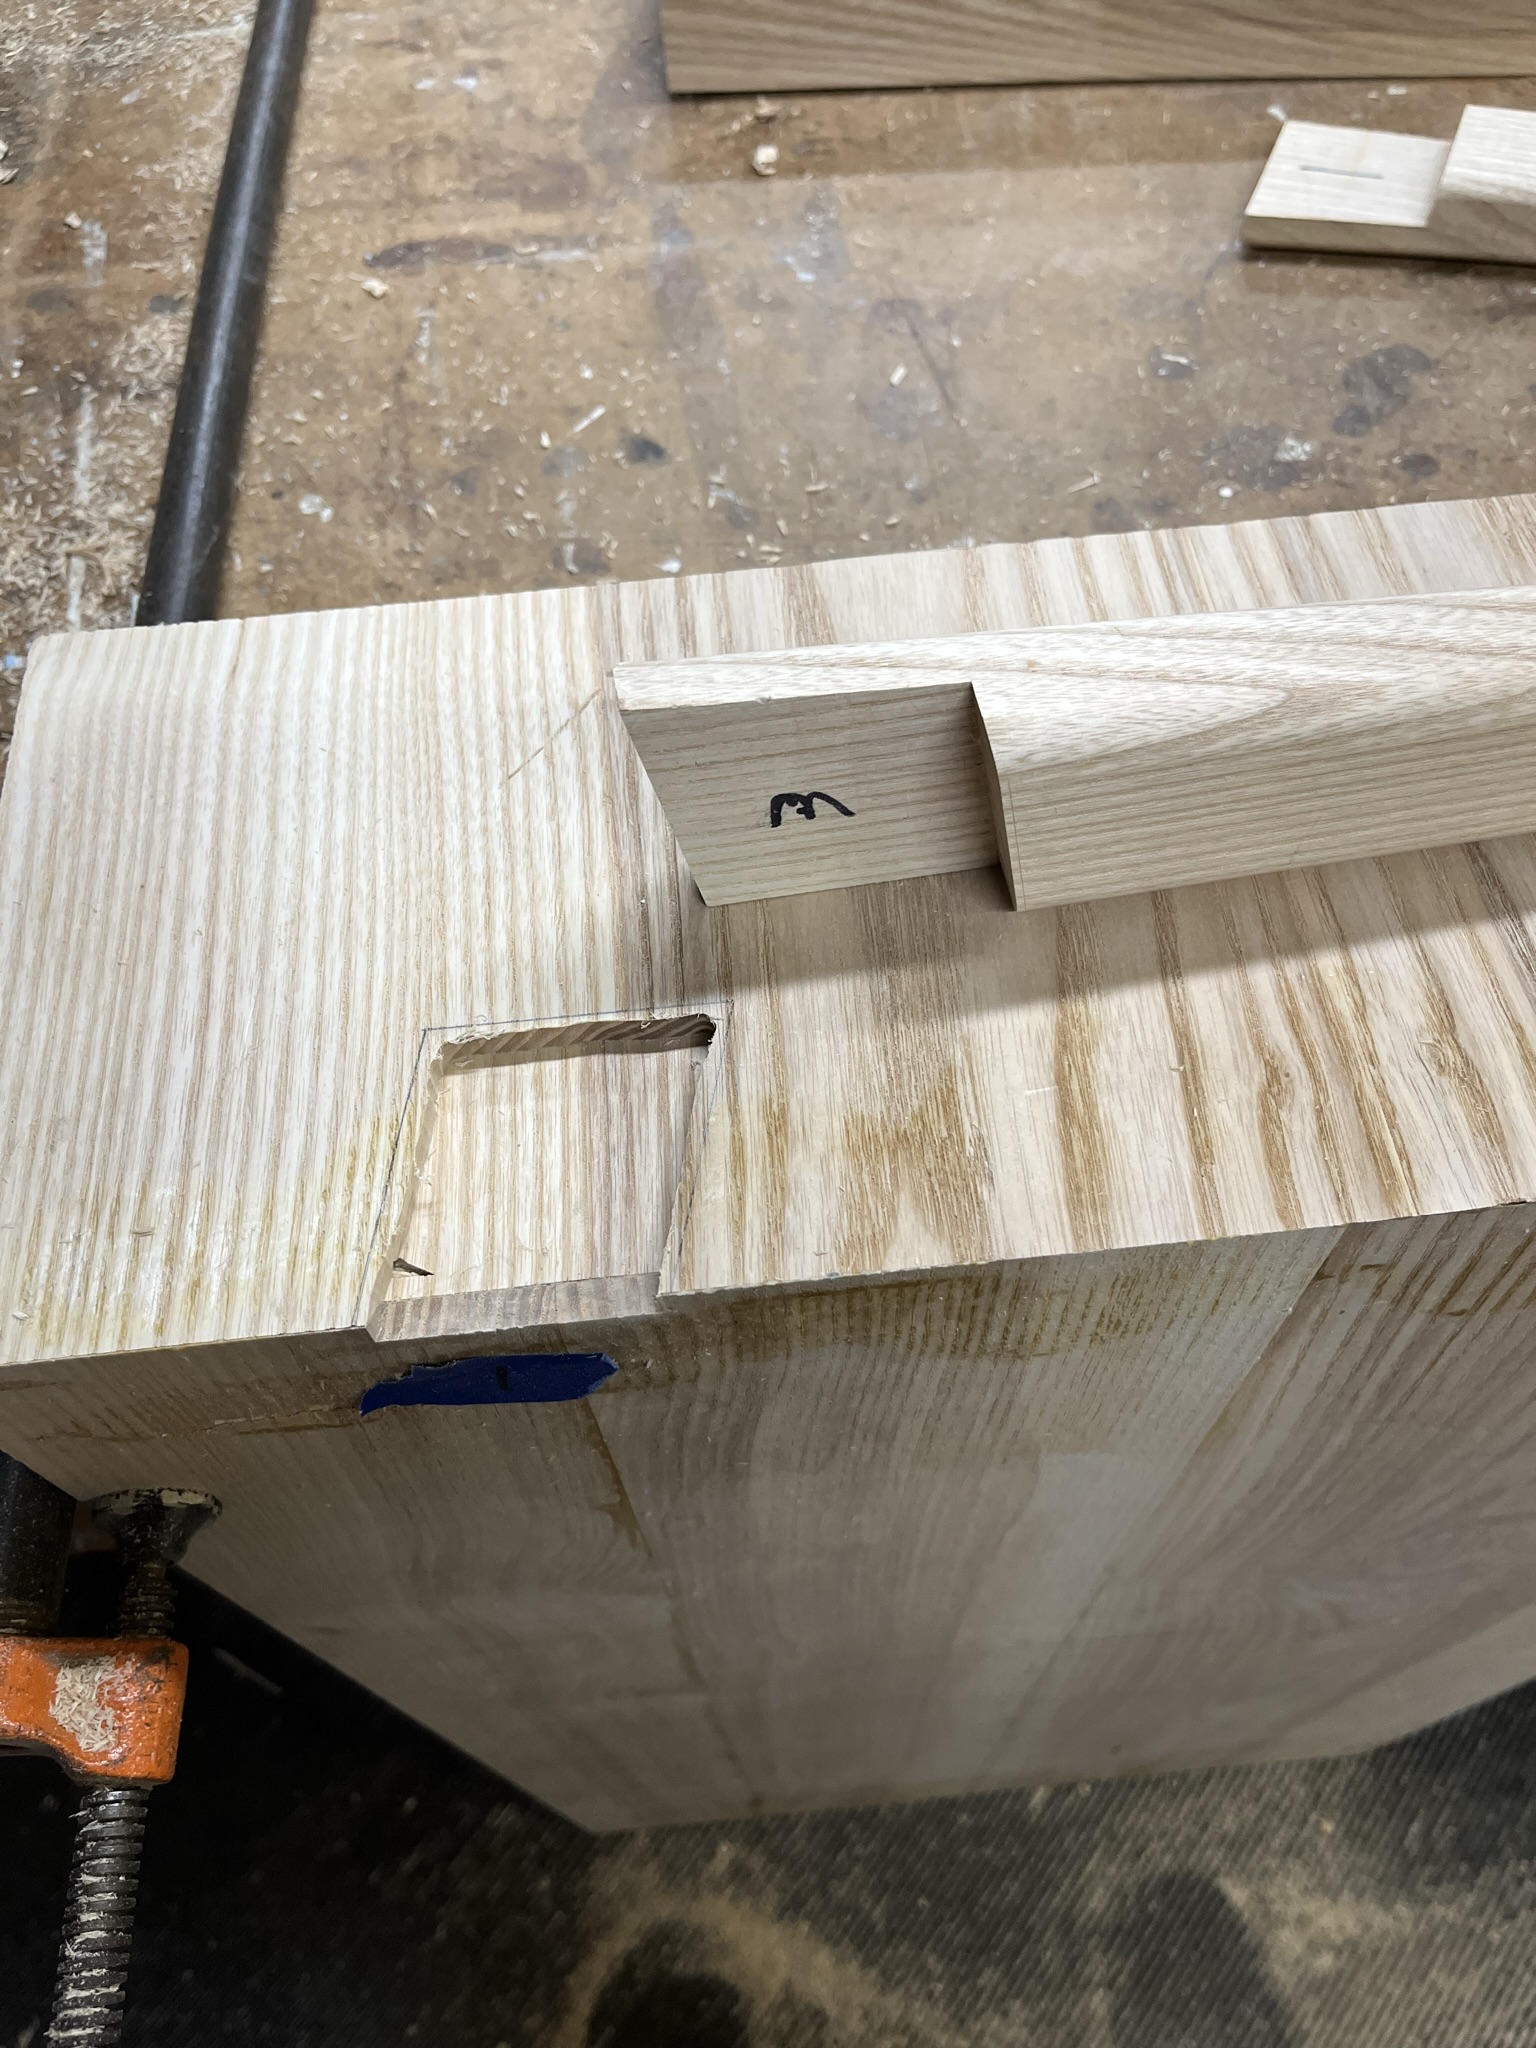
One of the legs, next to the (unfinished) slot it fits in on the top, to give a sense of how this joint works.
In theory this isn't a terribly strong joint: the leg just fits into a slot, there's nothing mechanical preventing it from shifting like there is with a dovetail or mortise & tenon.
In practice, I think this is strong enough. The joint is glued together, and this is quite a lot of surface area for glue contact. There are also screws driven from the inside of the box to reinforce that.
I wouldn't trust this joint on something large like a dining table, and I would avoid using this coffee table a makeshift step stool (though I'd probably do that anyway since I think it's a nice table!), but for something this small that doesn't need to hold a lot of weight I think it's going to be fine.
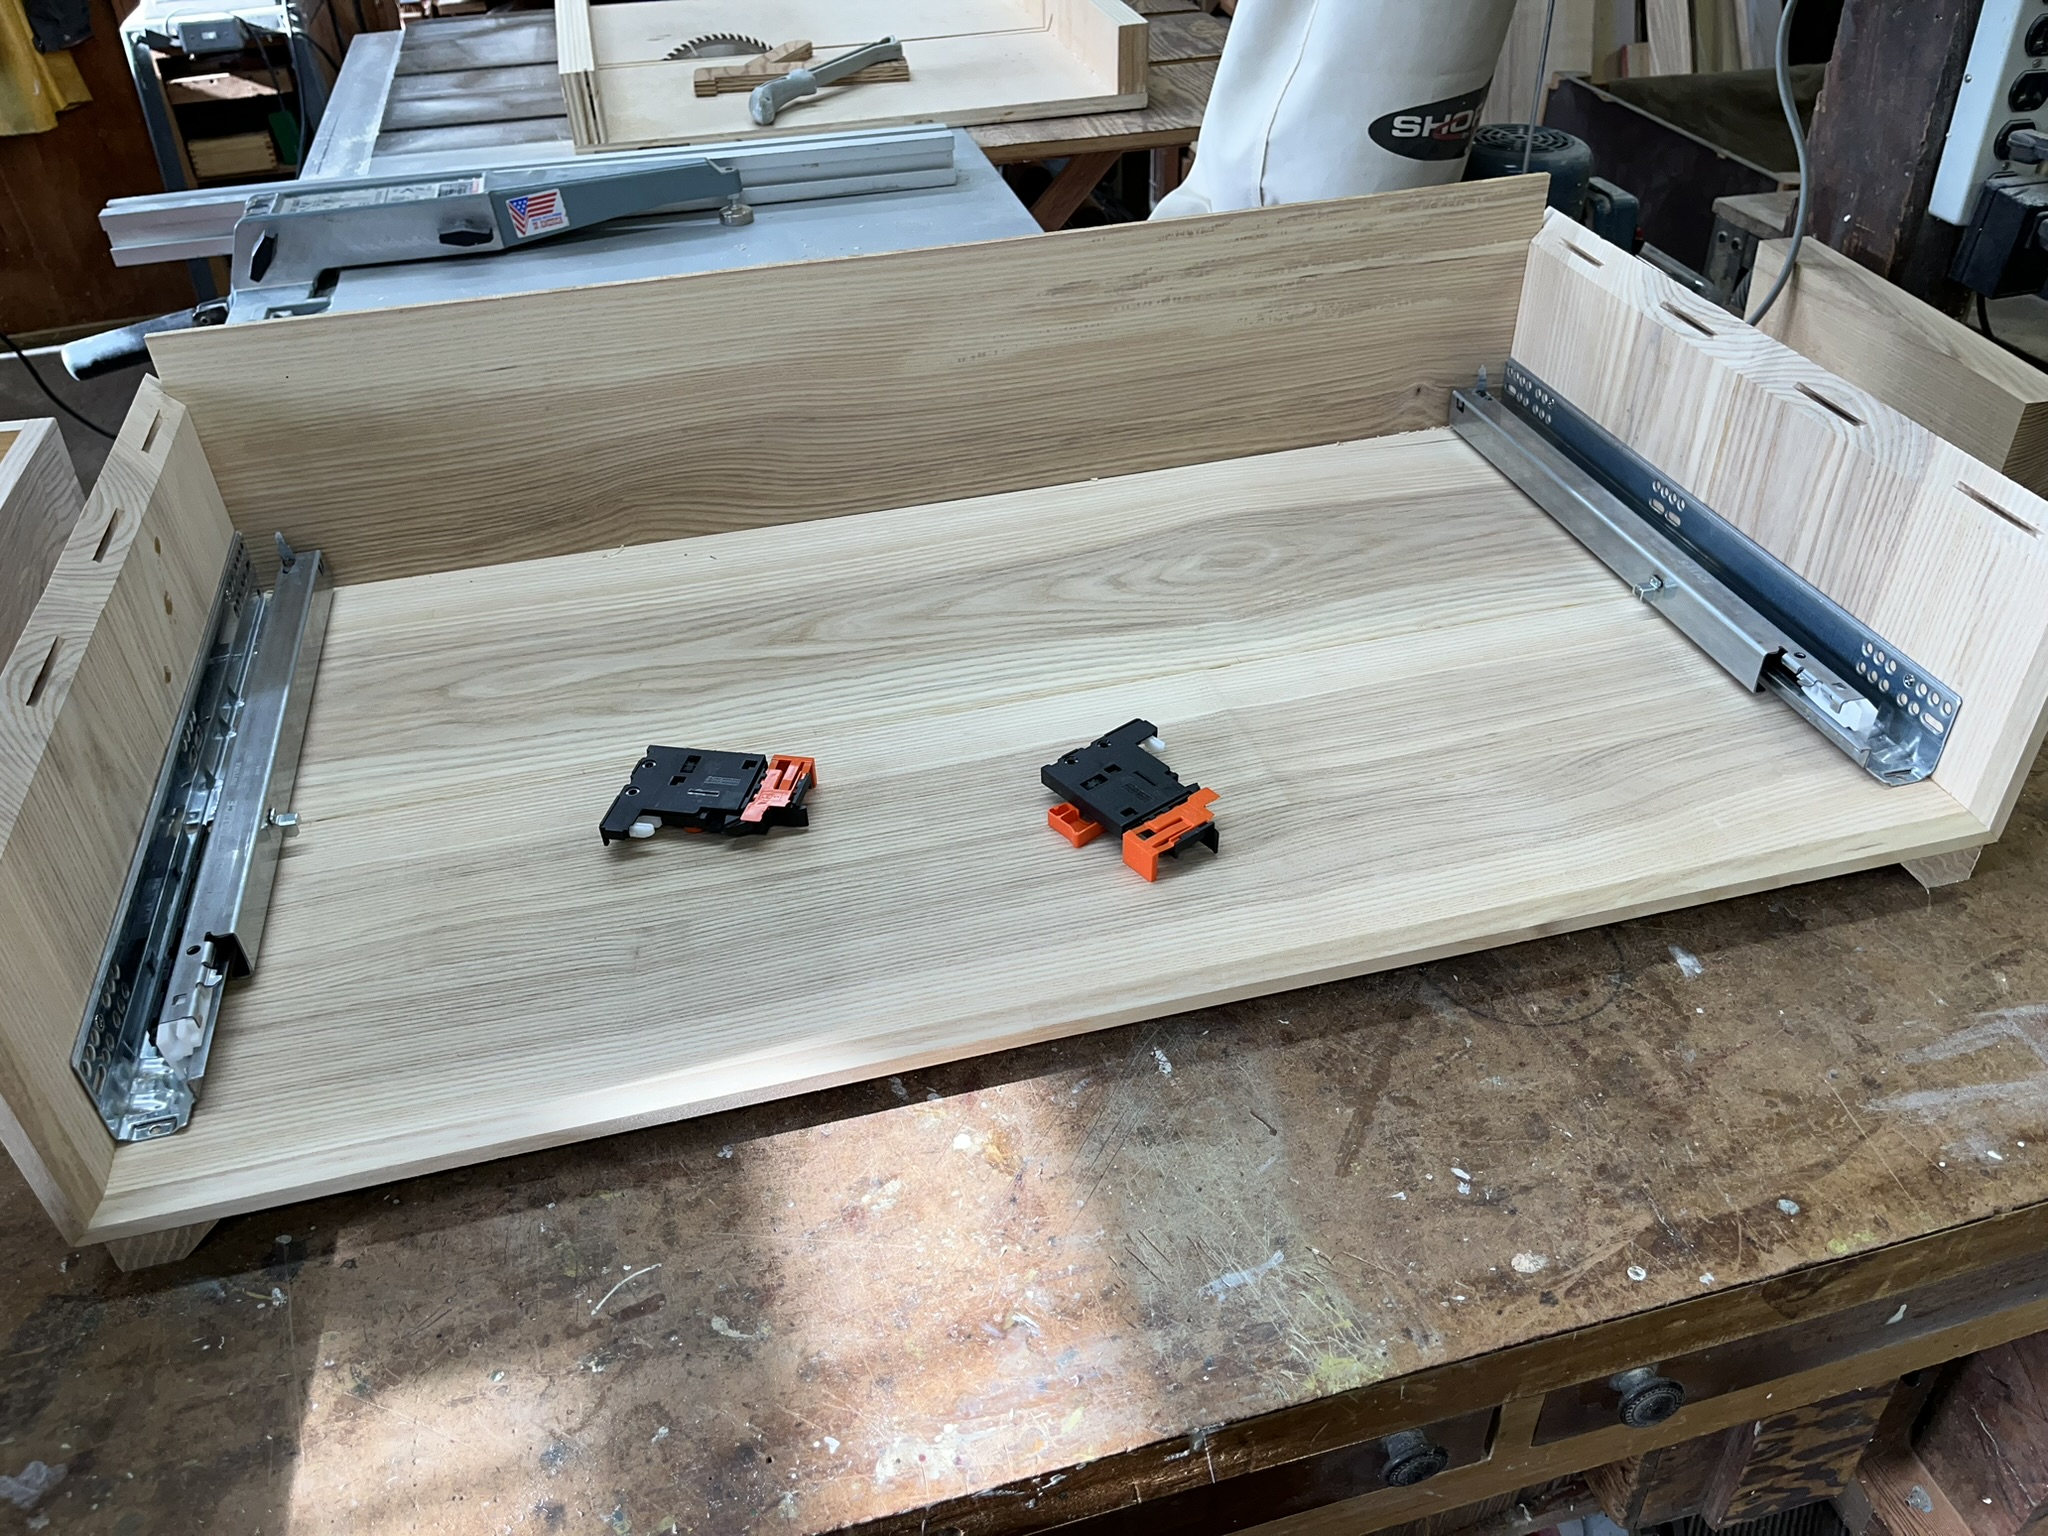
An unexpected but interesting challenge in constructing this was realizing the dimensions meant that I had to re-order the usual steps. Normally, to make a cabinet with a drawer, I would fully build the carcass (the body), then attach the legs, and finally install the drawer slides & drawer. But the interior of the box in this case is only 5” high, and nearly 20” deep, which is too small to comfortably work inside of for the screws that help to hold the leg joints or for installing the drawer.
So in this case I first glued up the bottom & sides of the box, then prepped the leg joinery & drawer slides, installed all of those, & then gluing on the top of the box was effectively the last step before applying finish.
An important lesson I took away from this (and should have learned on the media console) is to alter how I glue up boxes with mortise joints like this. My approach to these has been to first glue on clamping cauls along the corners, then clamp the joints, then knock off the clamping cauls & sand smooth (Somewhat visible in this photo of the media console glue-up, and well explained in this video, where I learned the technique.)
This works well & makes for a good clean joint, the issue is related to the fact that I’m building with ash, an open grain wood species. “Open grain” means there are small nooks & crannies in the wood, and the glue used for the clamping cauls gets into those nooks where you can’t sand it off, leaving a color residue that’s somewhat noticeable near the corners of the finished piece. I’ve tried alternatives to glueing the cauls, like strong carpet tape, but haven’t found it strong enough. In the future I might try applying grain filler, which is used to fill open grain woods before finishing for a smoother surface, before glue-up. As long as the grain filler doesn’t affect glue adhesion too much, that should make it possible to fully sand off the glue residue.
Speaking of which, this was also my first project using wood grain filler. I have normally been fine with, and even enjoyed, the slightly uneven finish you get on ash, but for a coffee table I felt it would be too rustic & wanted something smoother. My test pieces looked great, but I wasn’t thrilled with how the finish went on the actual table. It mostly looks good, but when the light hits the table top at certain angles there’s some unappealing “striping” in the color of the wood. I used Aquacoat, a water based grain filler, and Osmo Polyx hard wax oil finish on top. Using an oil finish over a water based grain filler might have been a bad choice, although the test pieces looked fine, and I may need to experiment more. I’m also hoping maybe the “striping” will be less noticeable as the wood ages and darkens a bit.
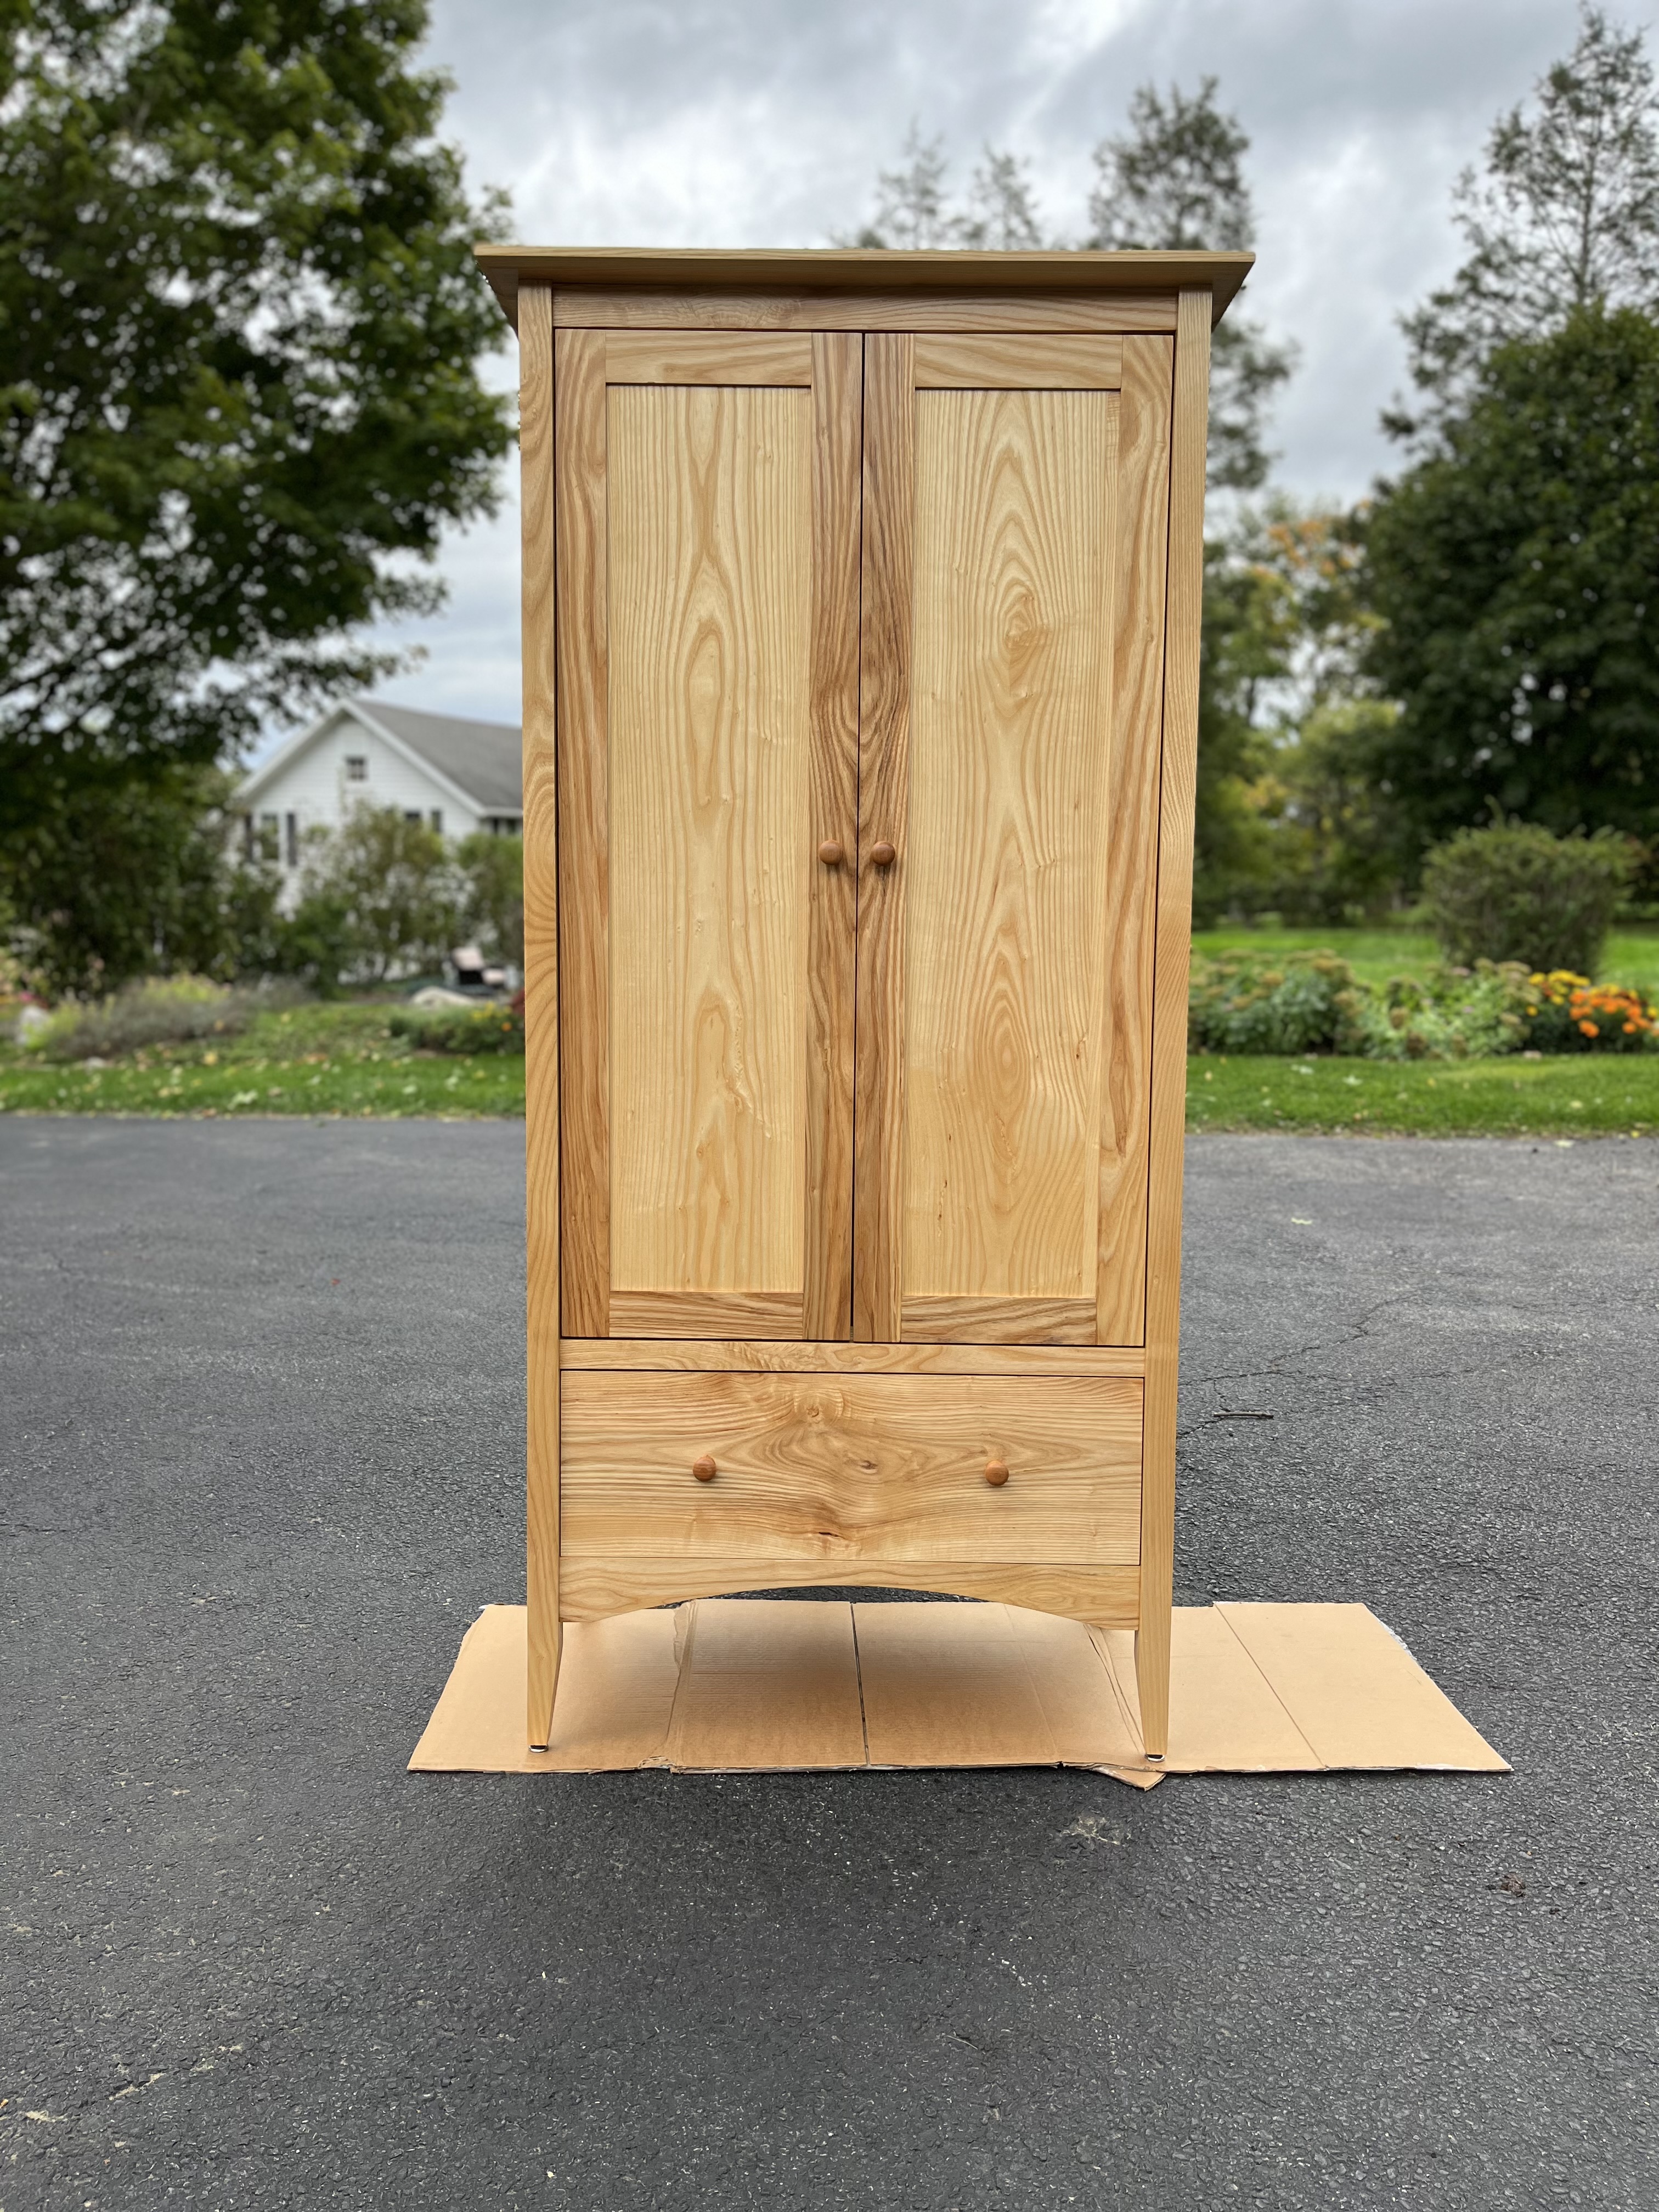
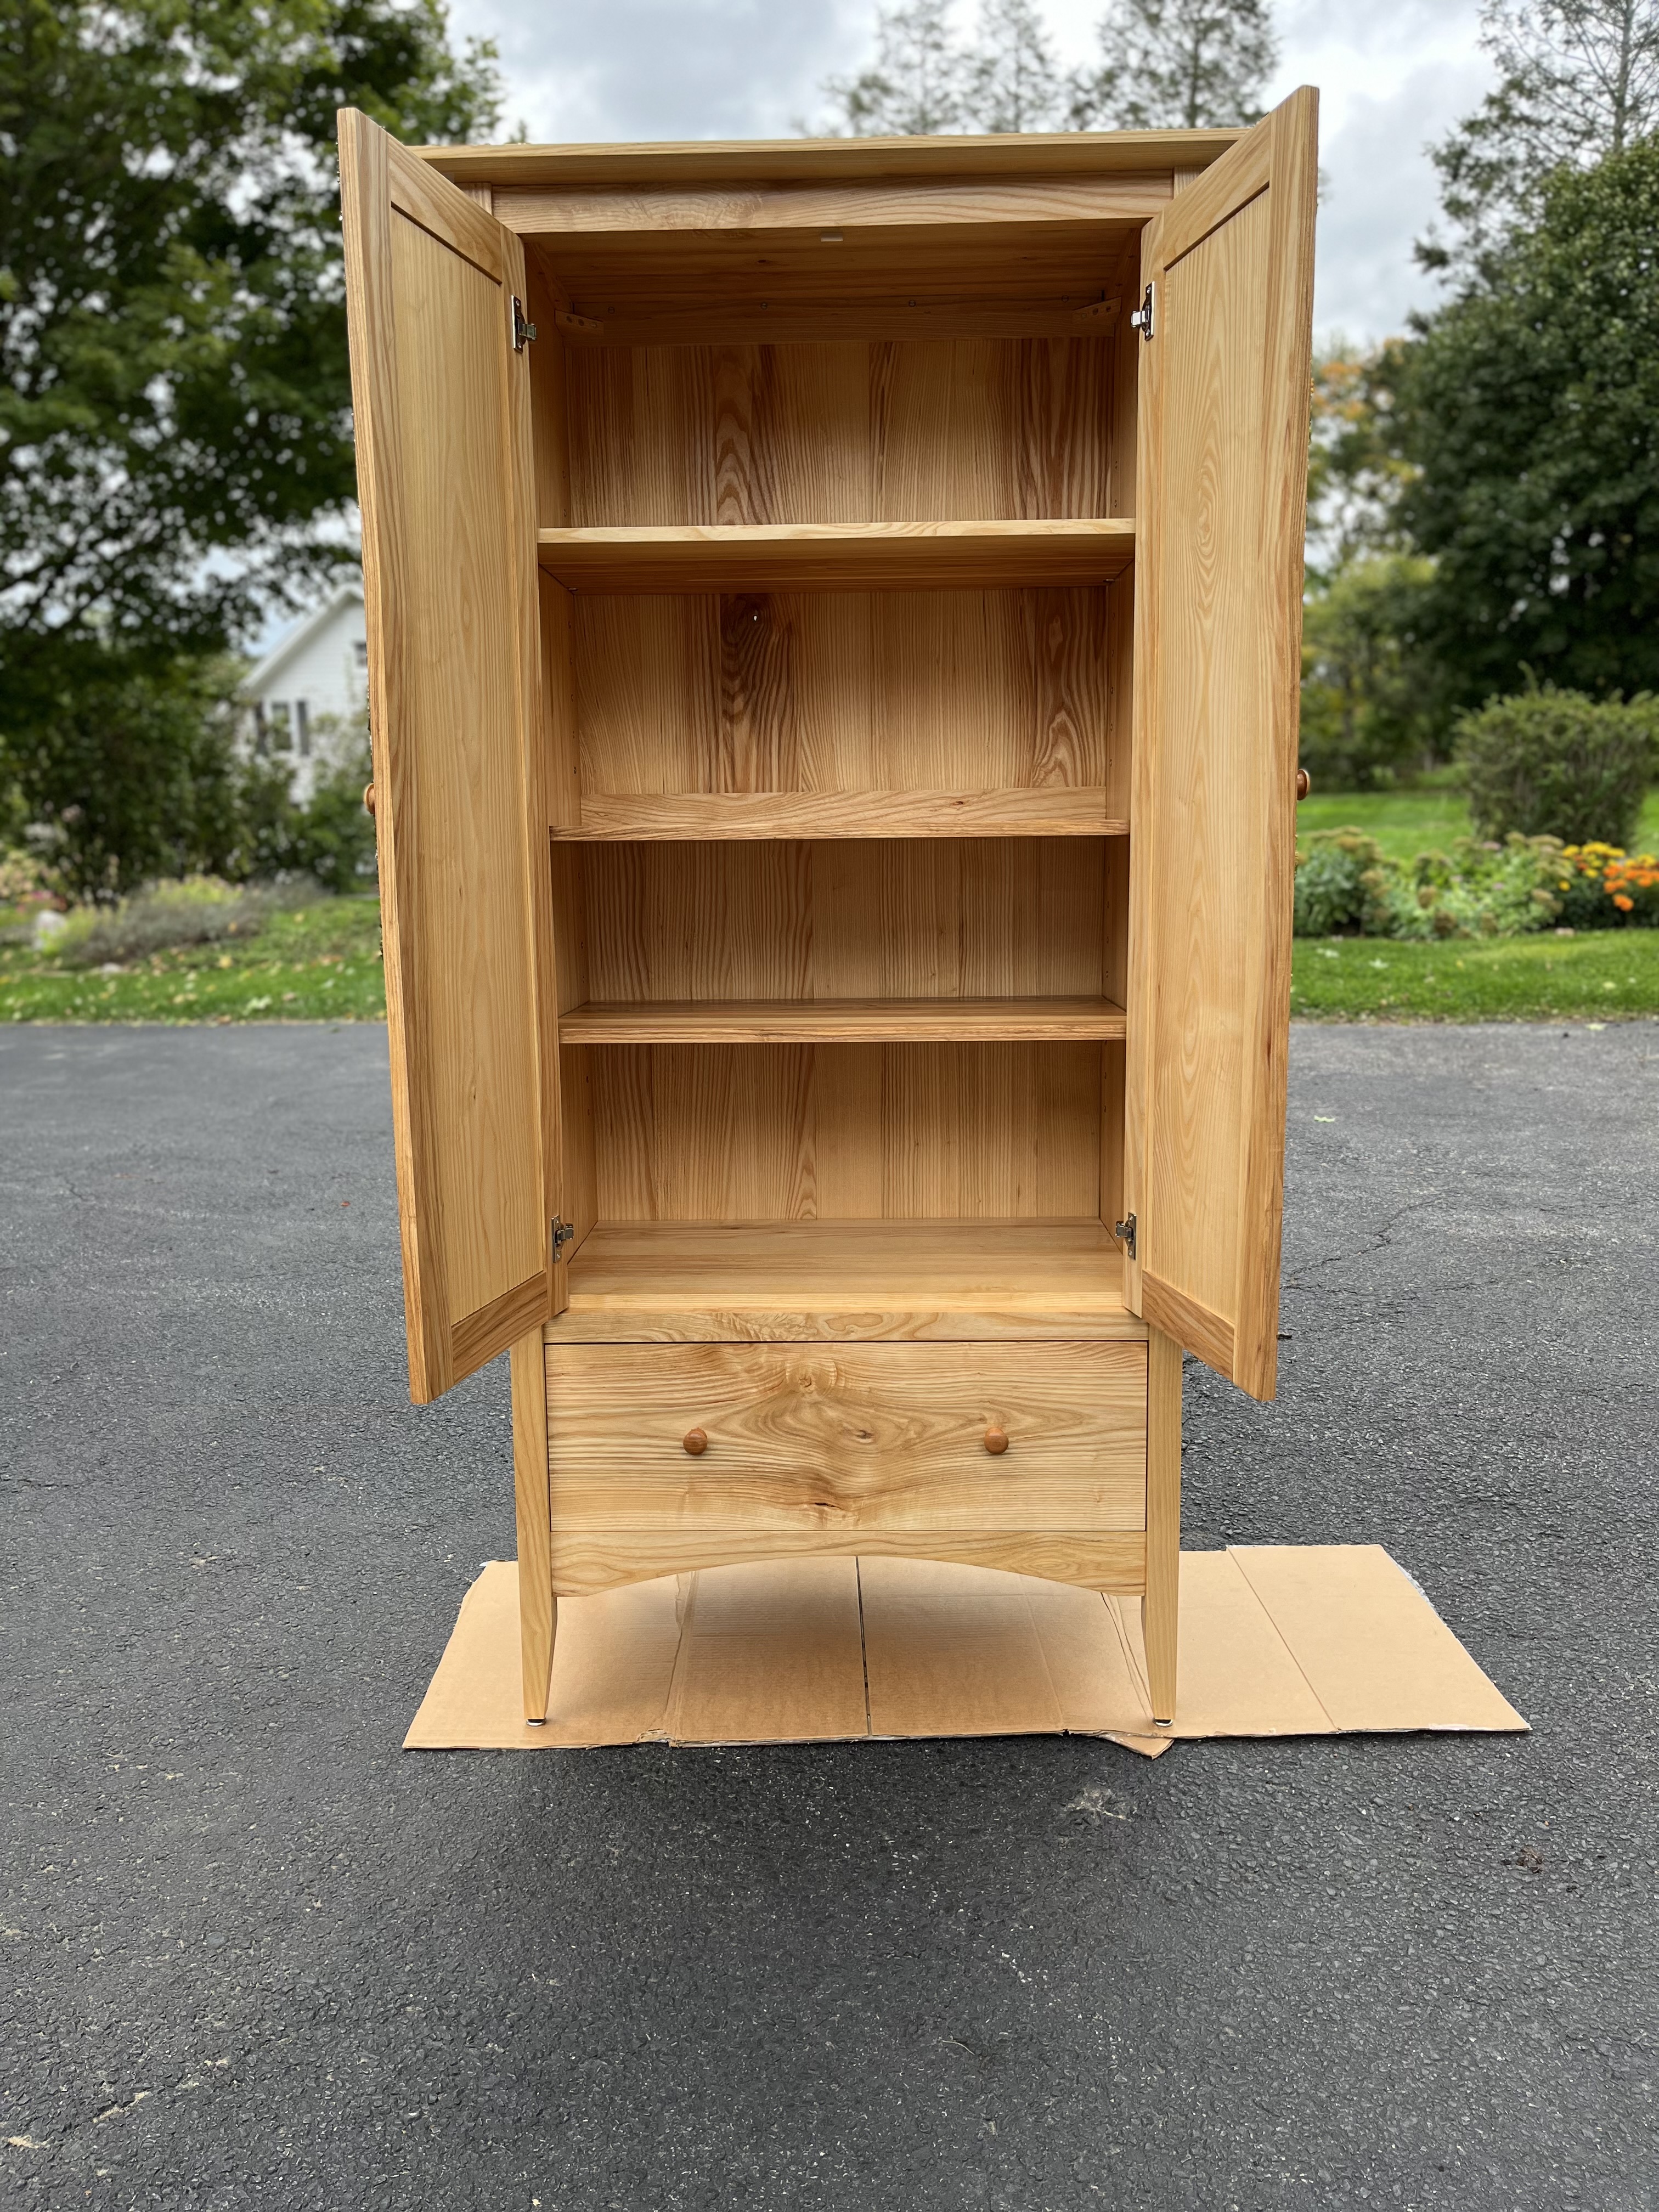
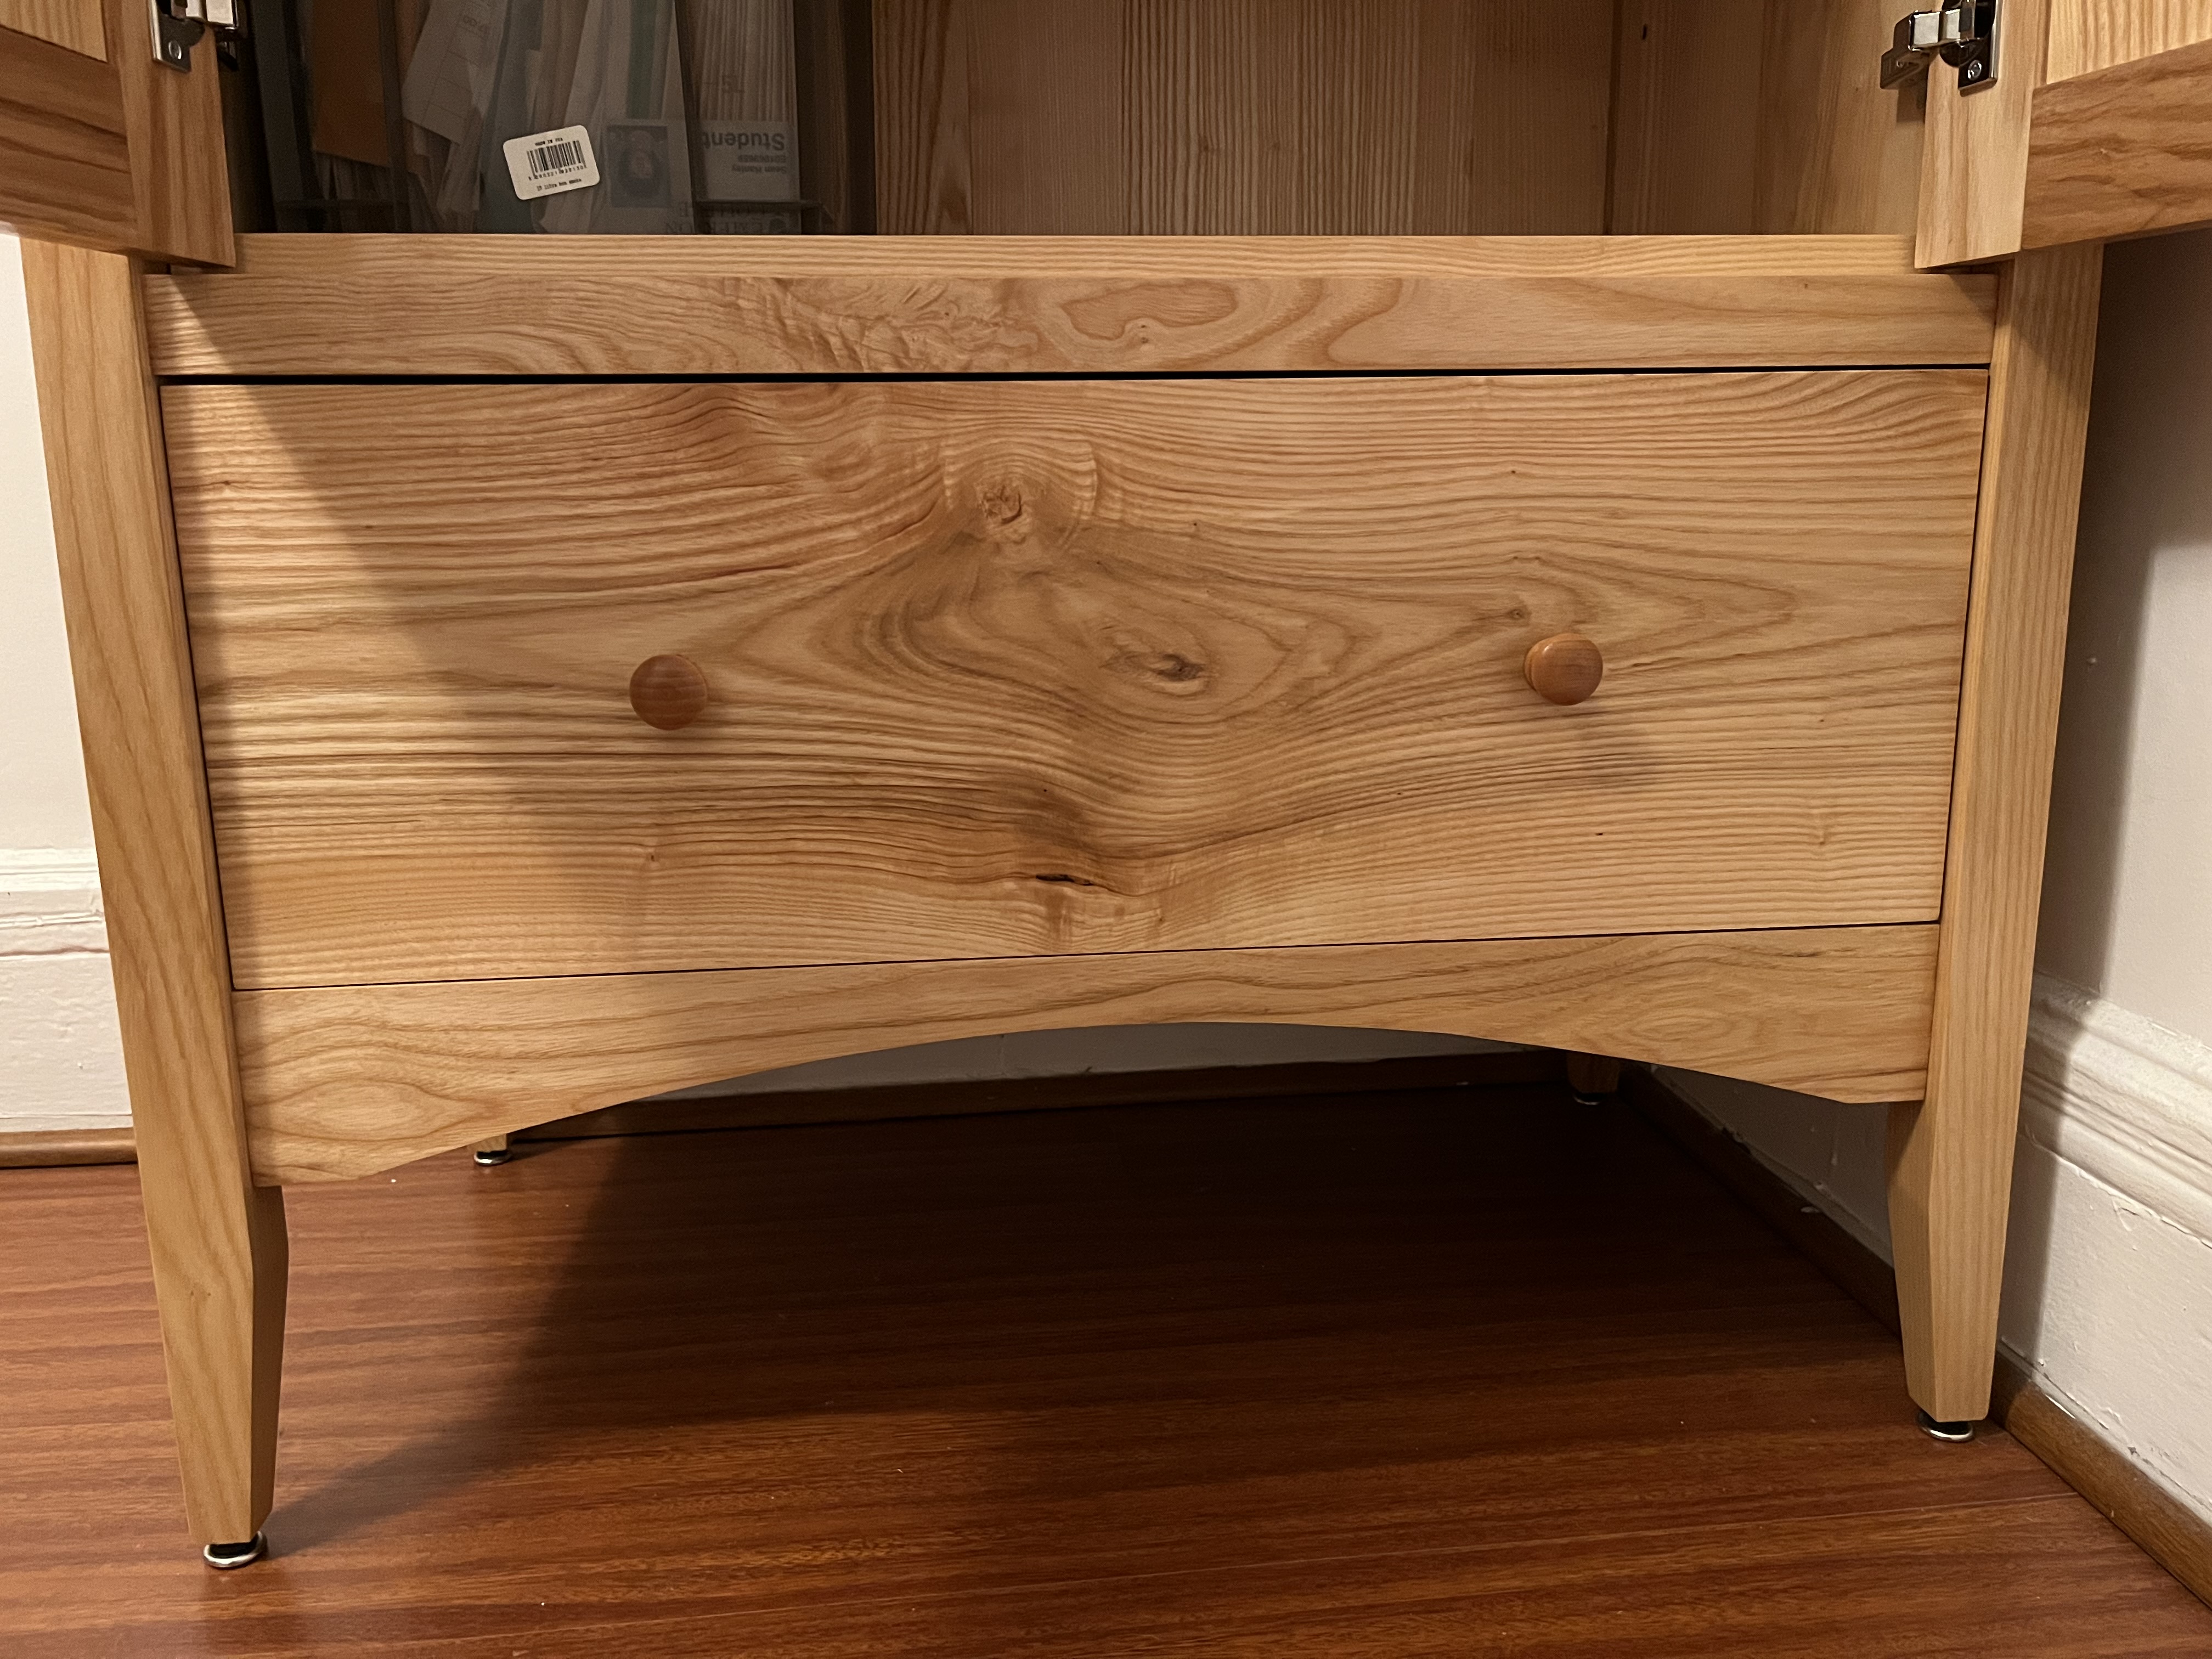
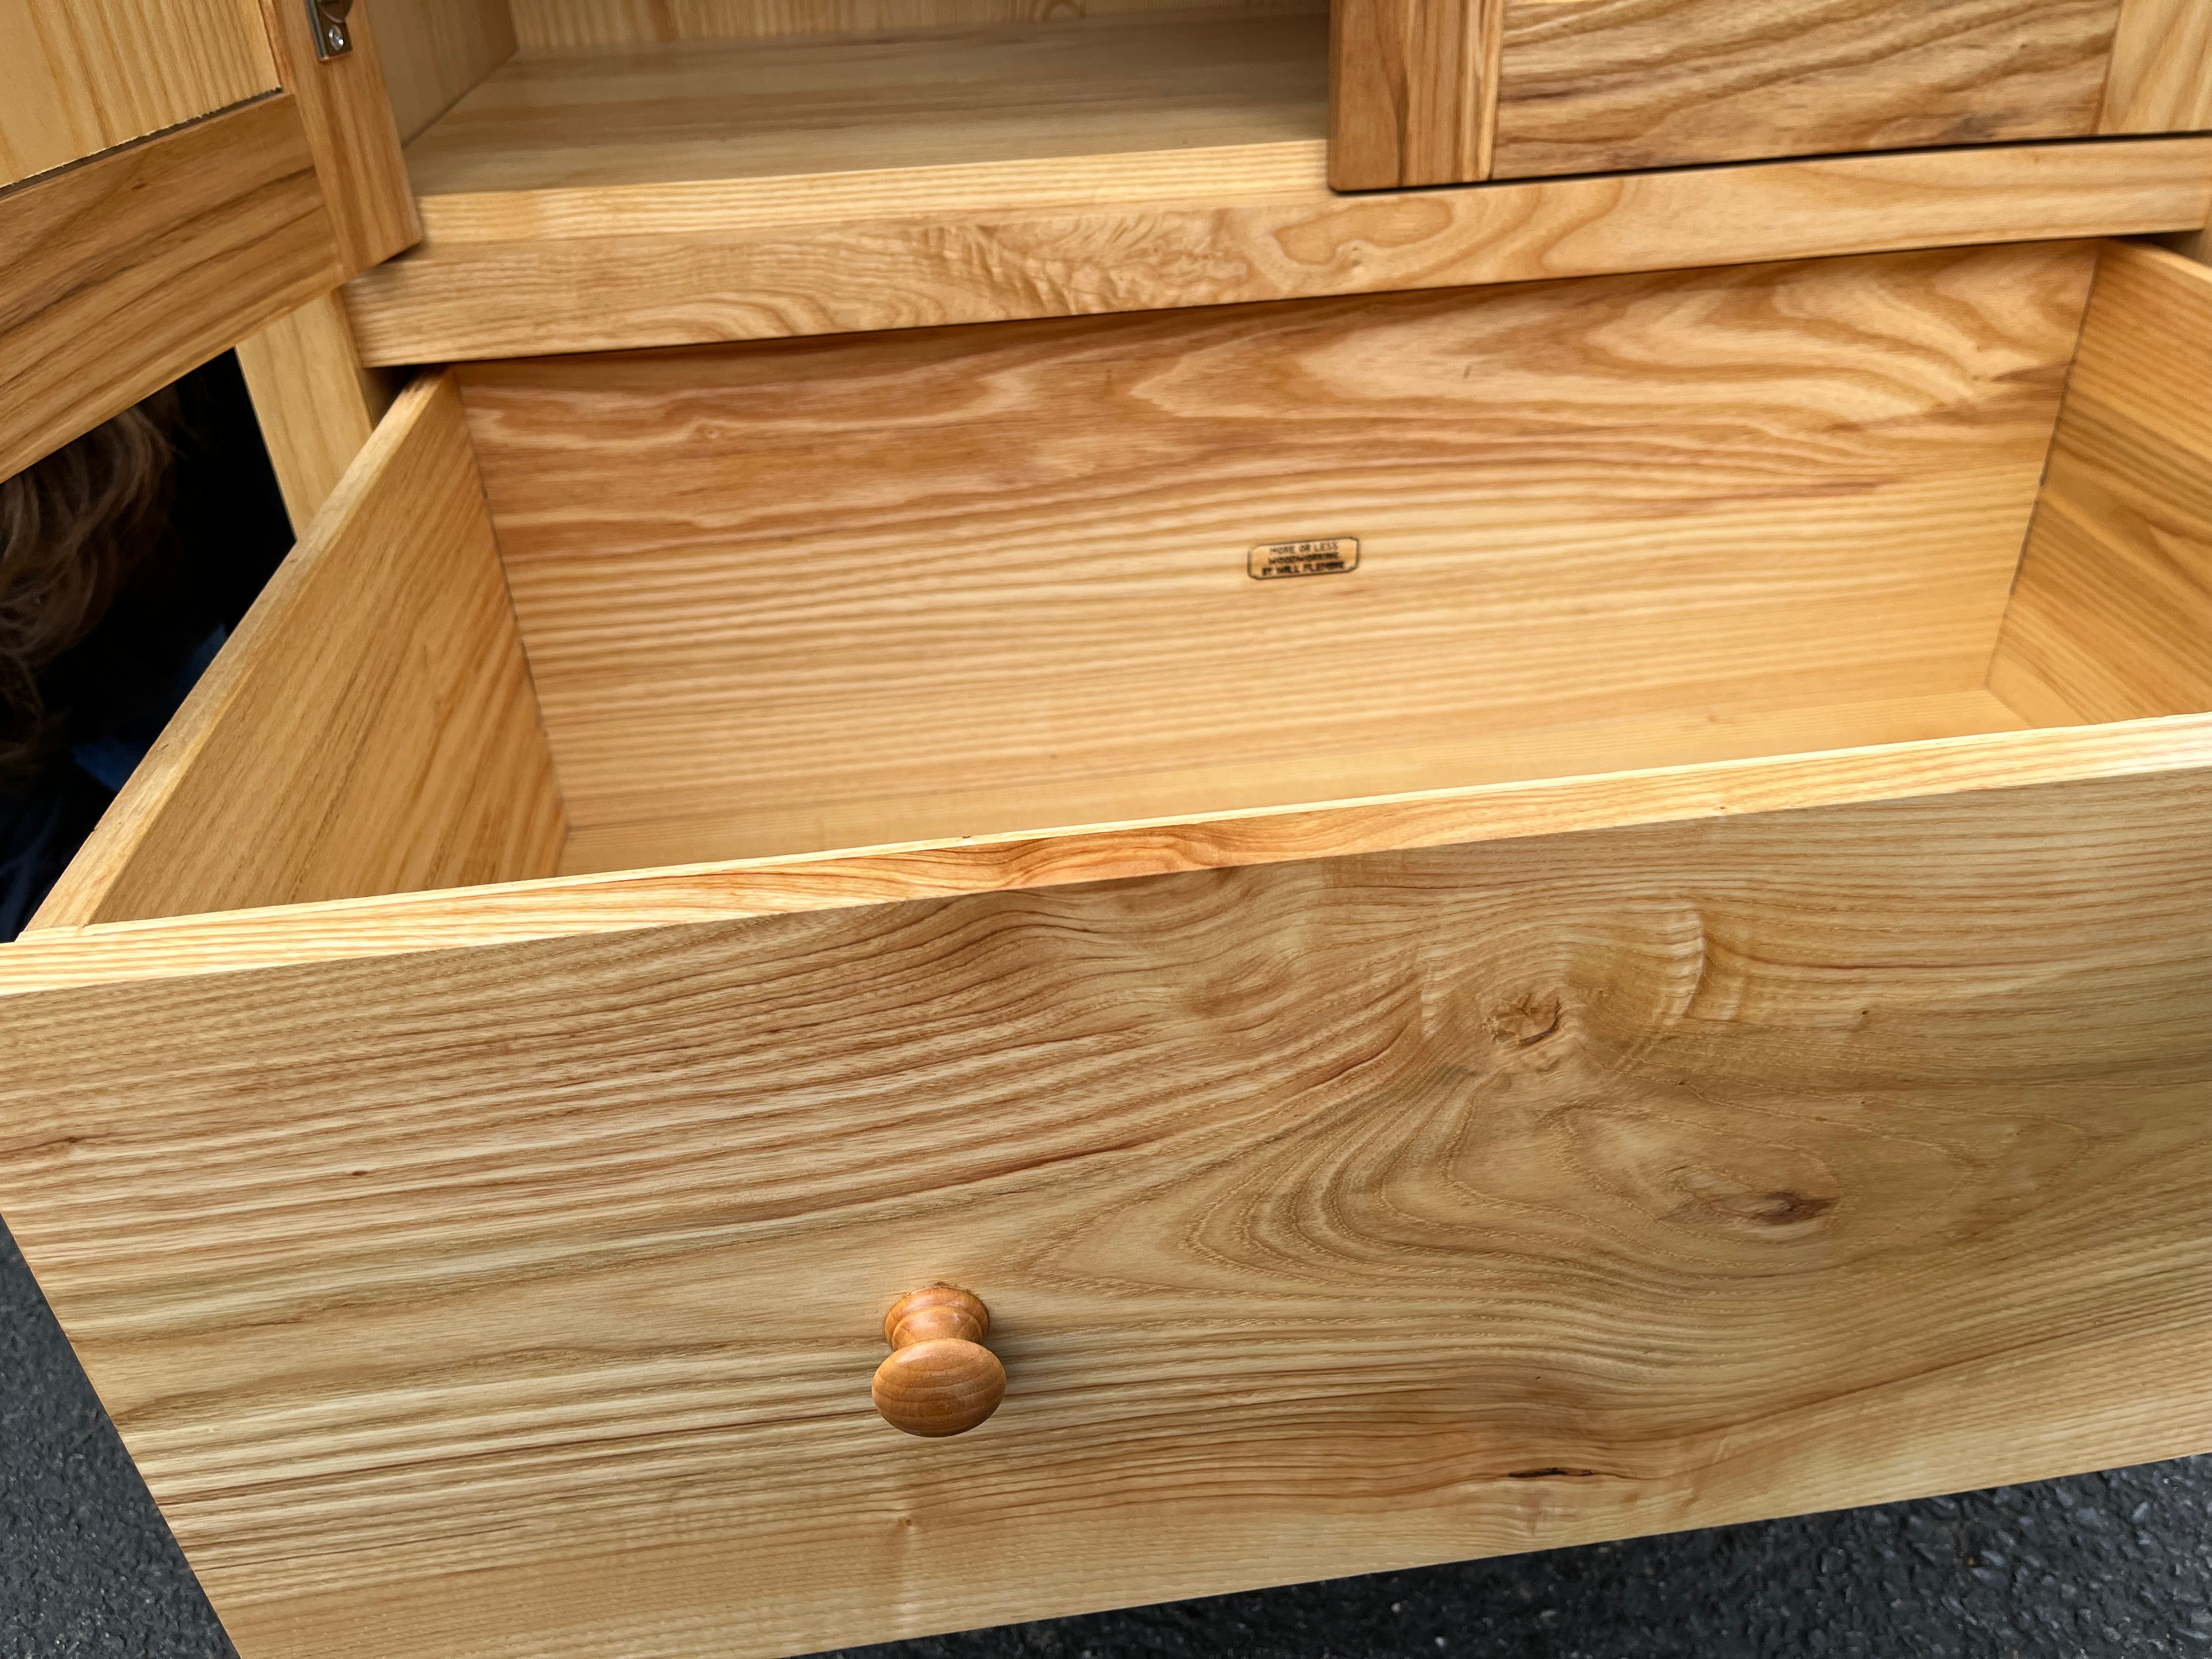
Armoire
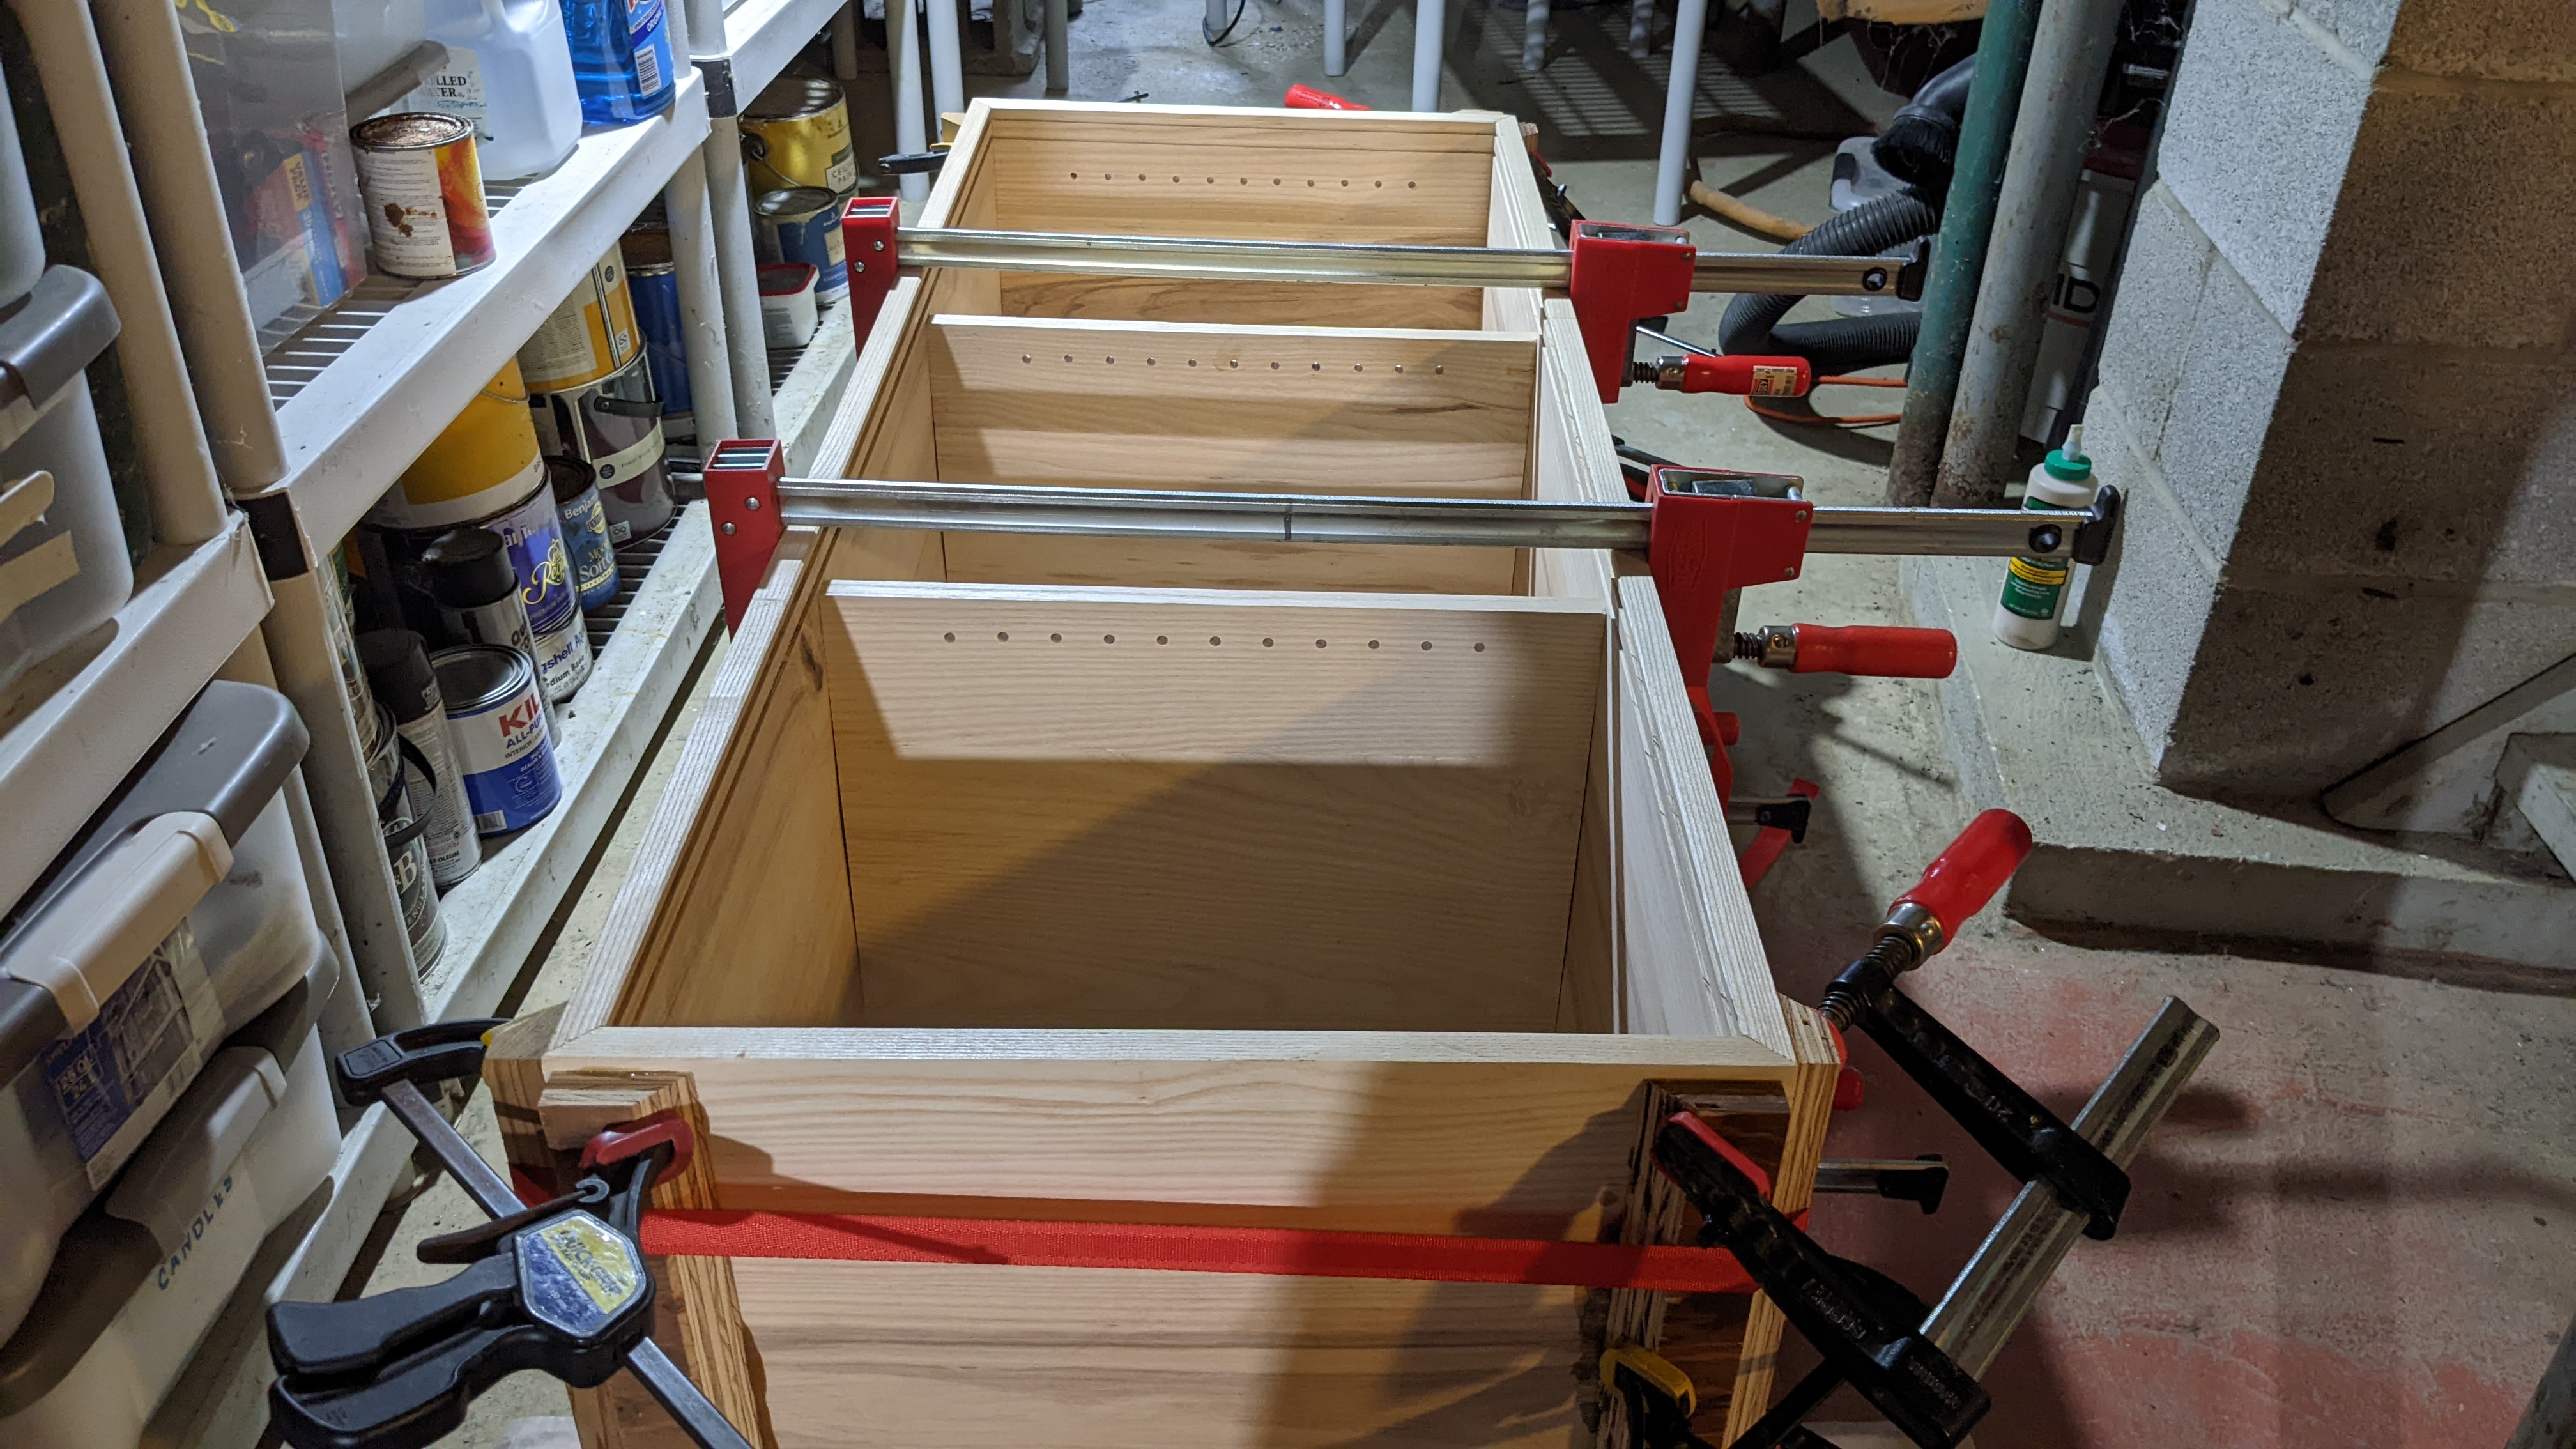
In between the media console, coffee table, and a few other projects, my sister asked for an armoire for her apartment. (Kind of a long story, but here’s the short version: she ordered a very nice used Shaker-style armoire made of cherry, but what was delivered to her was a cheap, child’s armoire about 3 feet tall made of pine. She got very frustrated with dealing with getting that returned when the seller wouldn’t acknowledge it was the wrong piece, and not being able to actually get what she ordered, so I made her one in a similar style.)
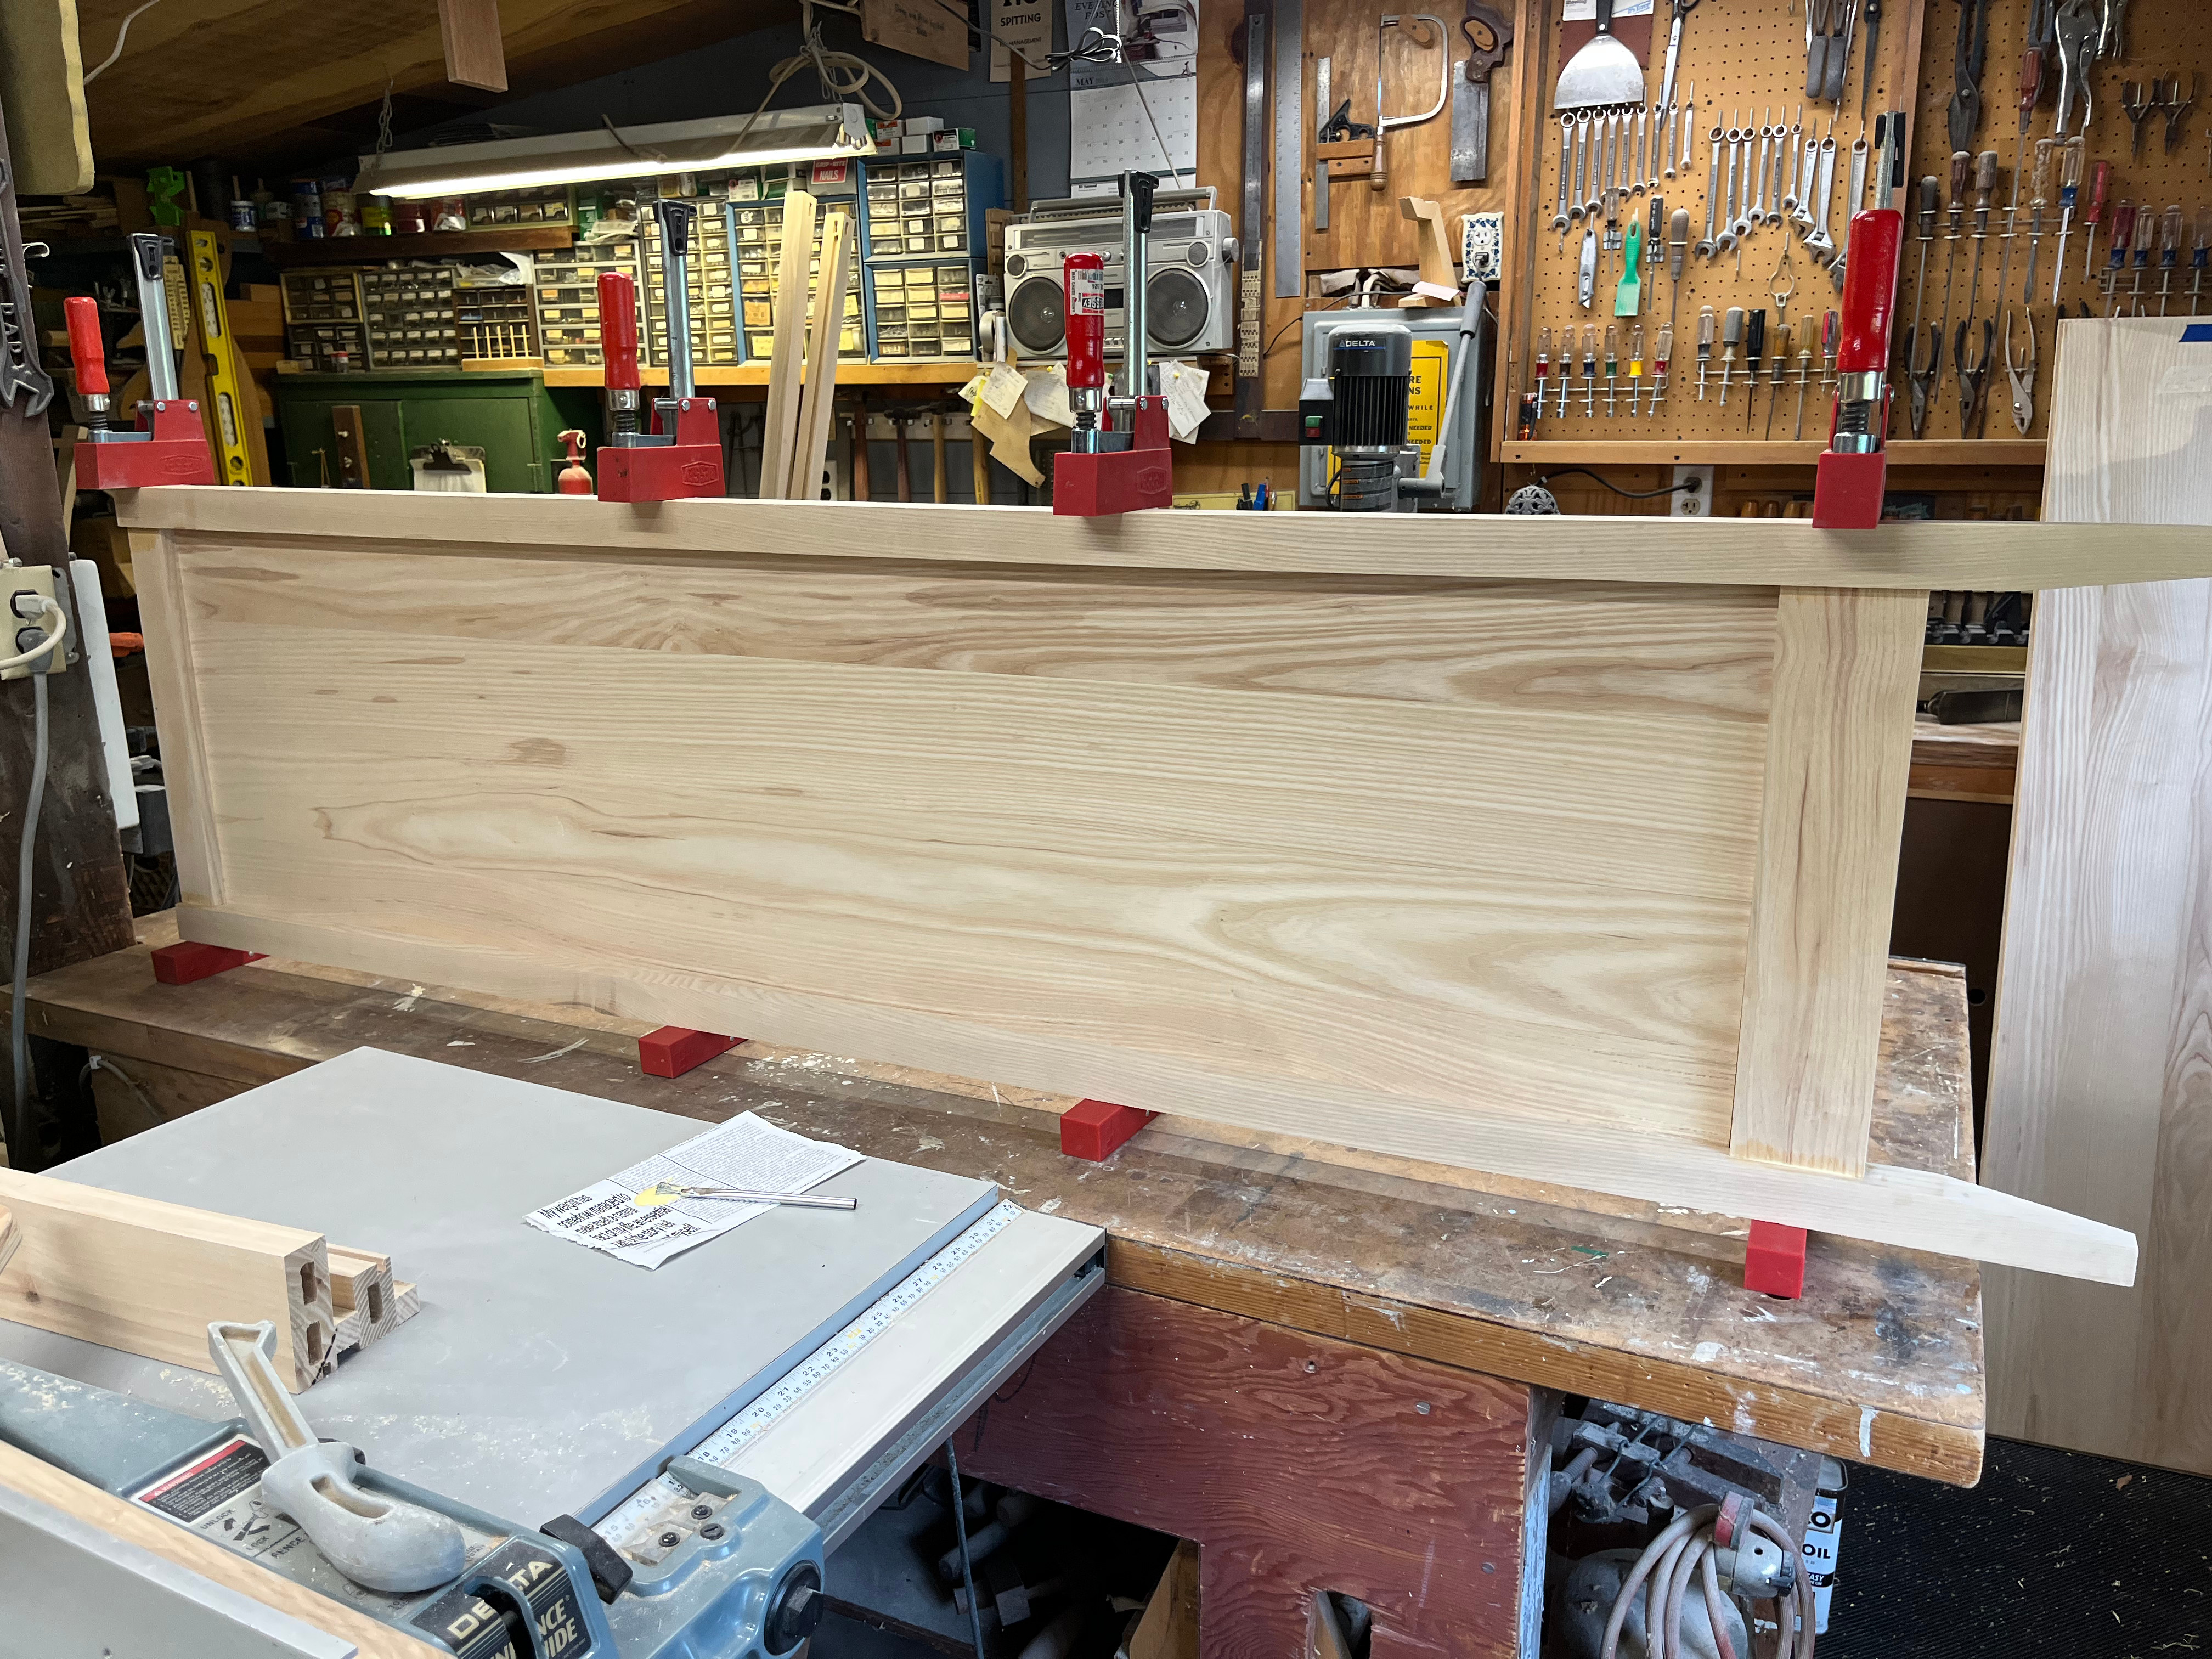
One of the side panels for the armoire being glued up.
The armoire carcass is effectively three large frame-and-panel assemblies attached to each other. I glued the side panels individually, then glued in the back pieces to make a finished box.
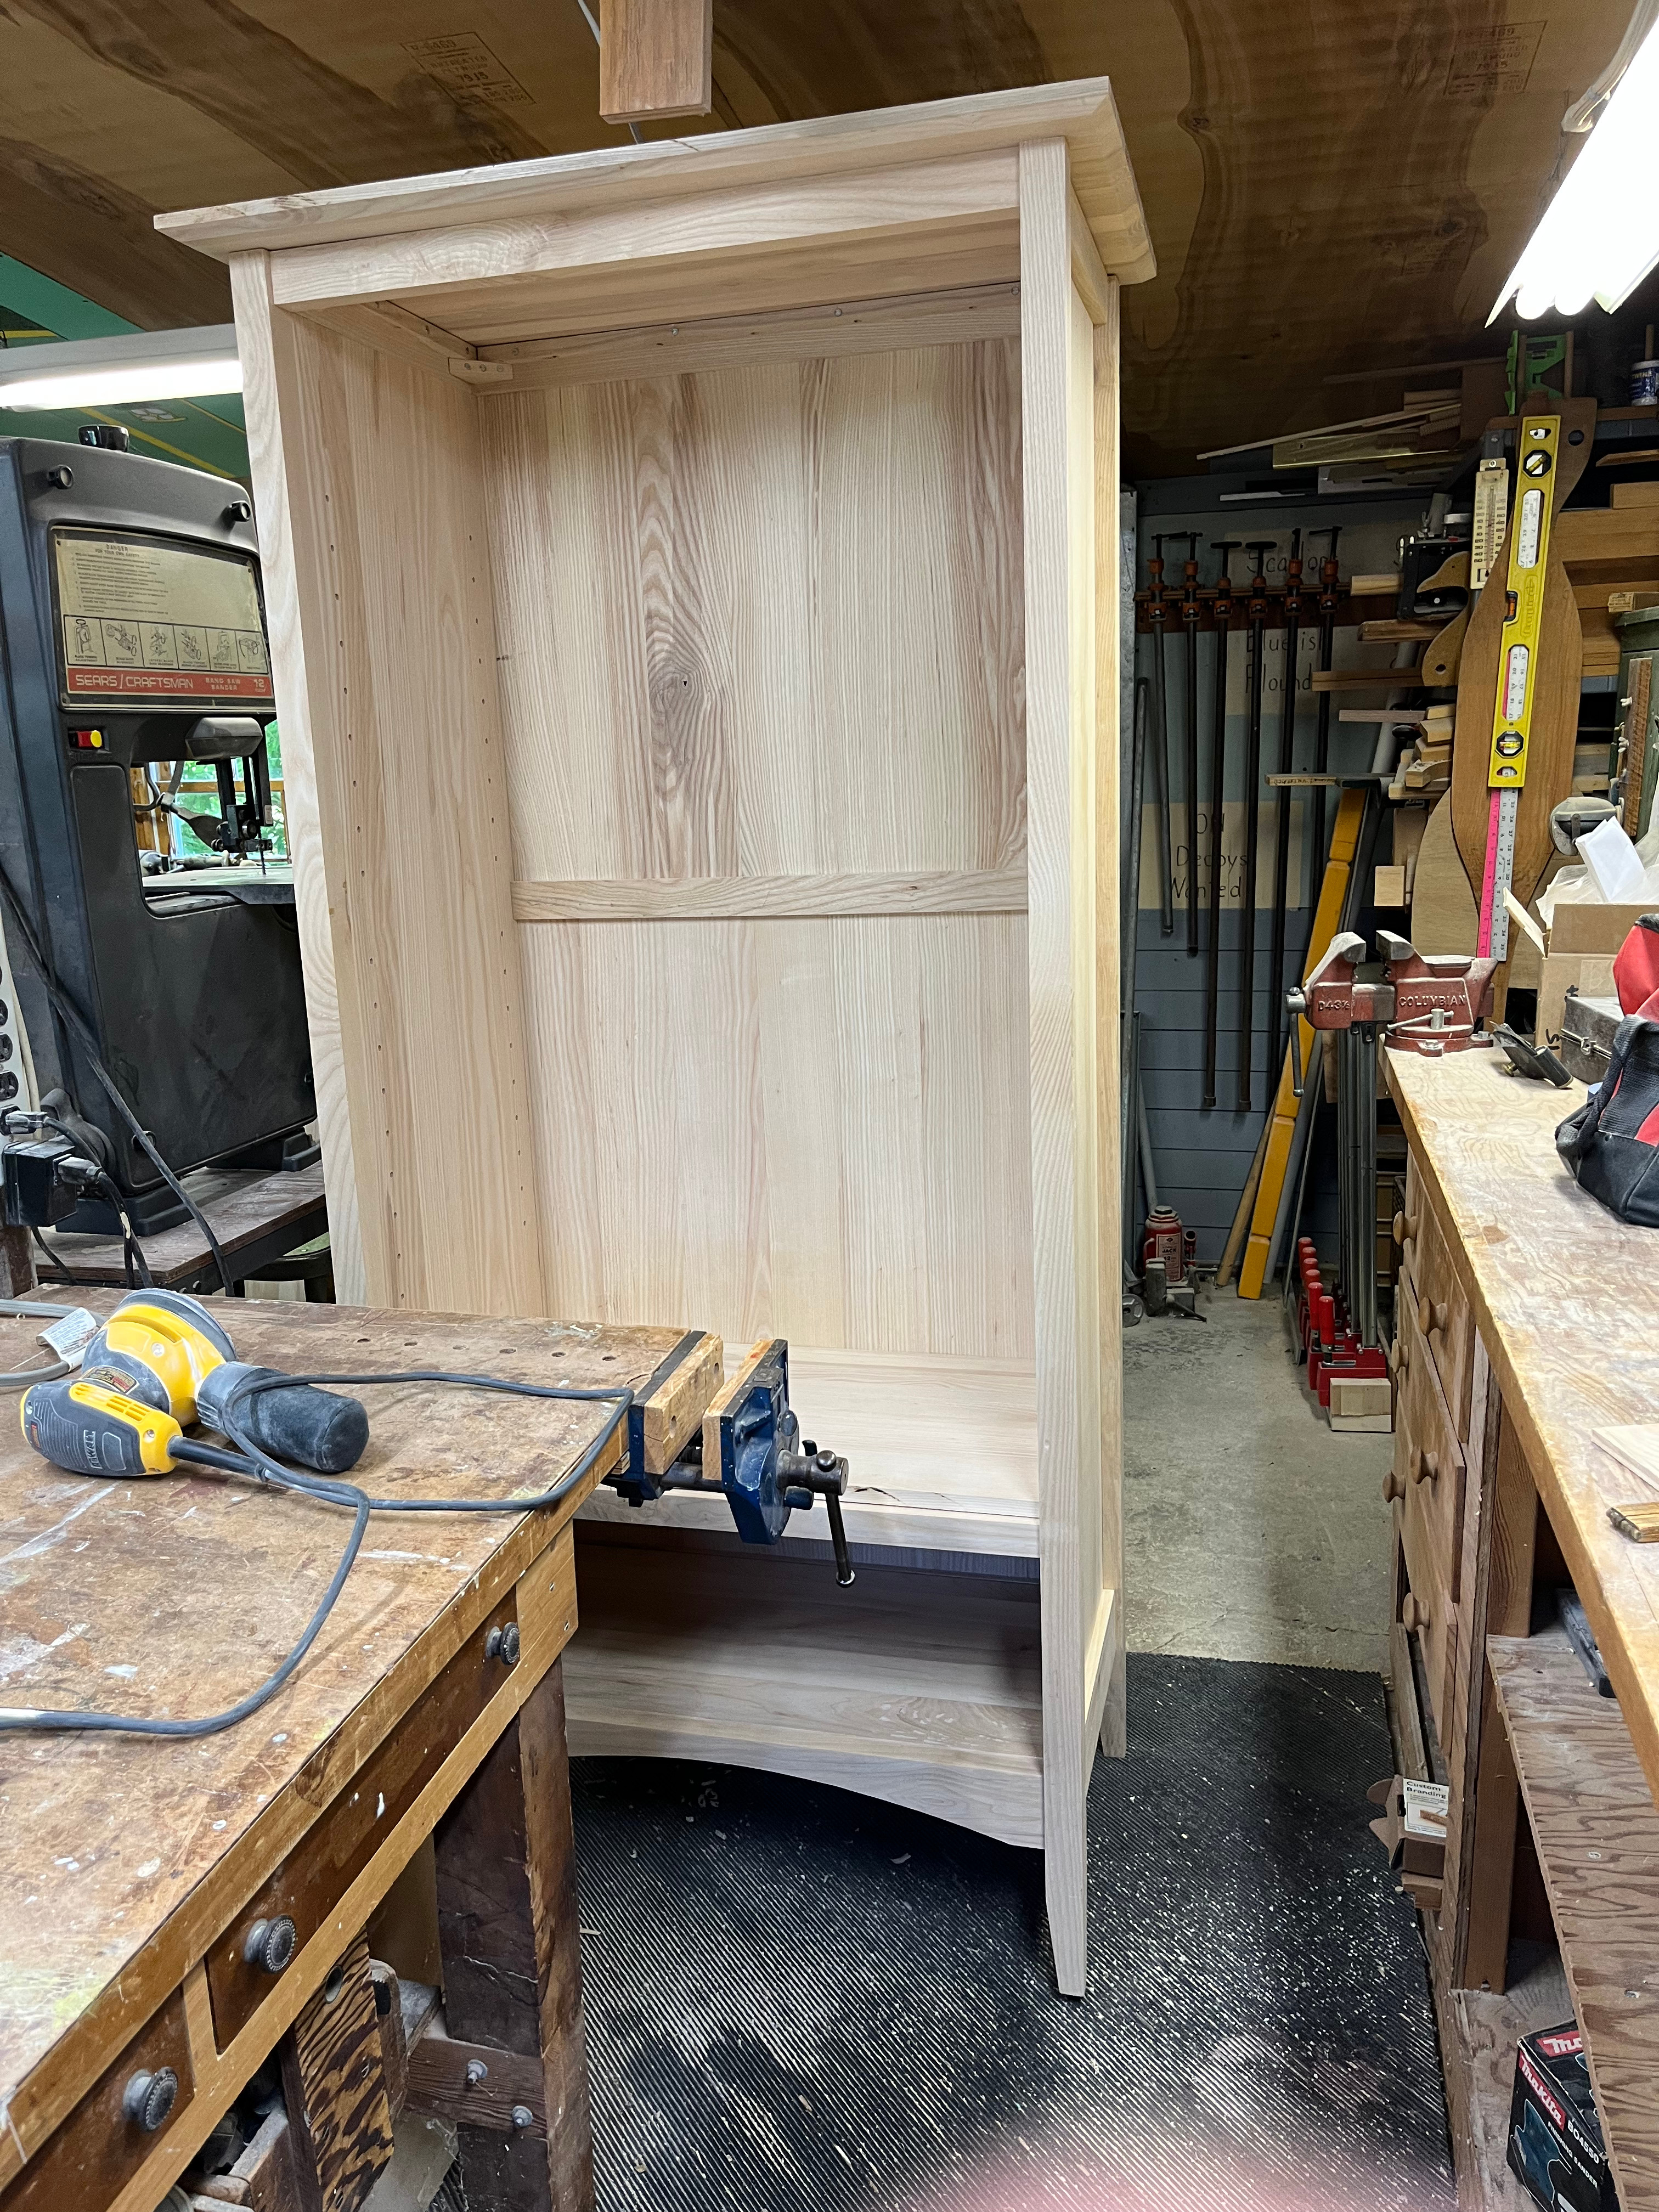
The big lesson from this piece was why large furniture isn’t often made from hardwood anymore: this thing is friggin’ heavy. With something like a dining table the weight isn’t usually a major issue because you can design it to be disassembled, except for the top. In this case, I felt designing the armoire body to be disassembled would compromise both aesthetics & strength, so aside from taking off the doors & drawer, the whole thing is effectively one inseparable hunk of awkwardly sized, very heavy wood. With the doors & drawers off, it weighs somewhere in the 110-120 lb range, and getting it up to third floor of a Brooklyn townhouse was an adventure.